Appearance
FinClip Administration Portal Guide
Please Note This document is continuously being updated, and some illustrations may differ from the online environment, please refer to the text description.
The login address for the Development Center is http(s)😕/IP/dev#/, and the login address for the Digital Center is http(s)😕/IP/ops#/.
1.Users
1.1 Account
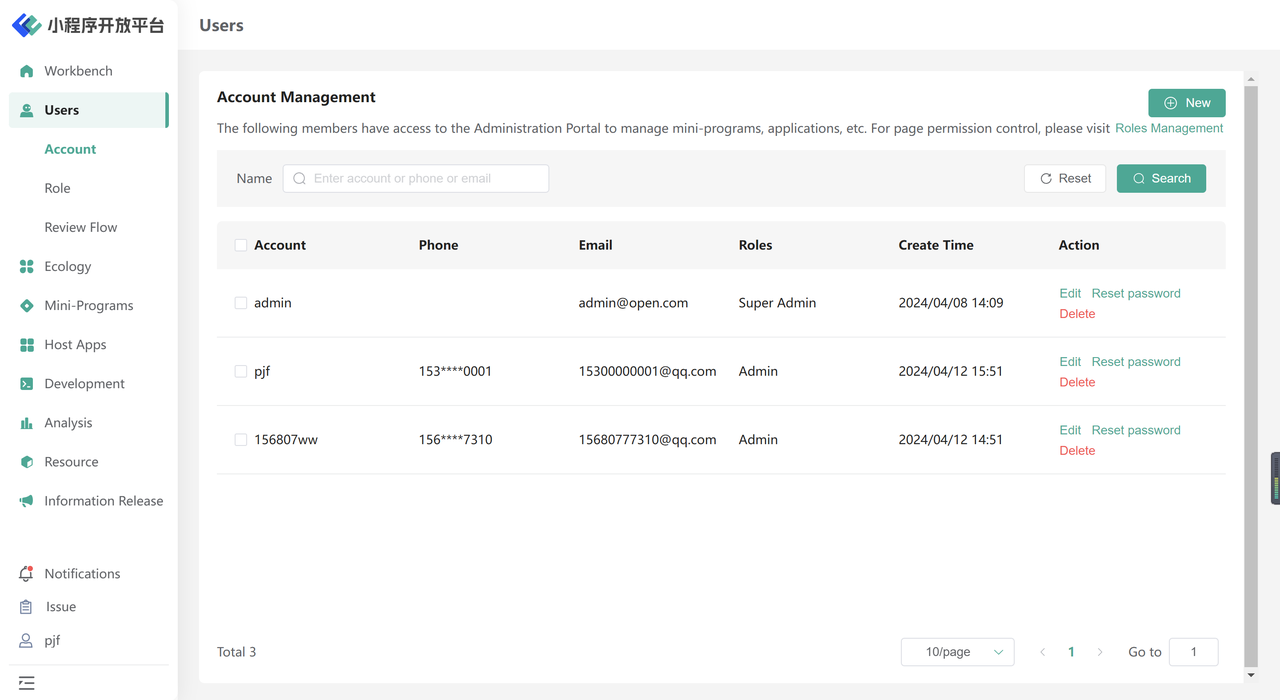
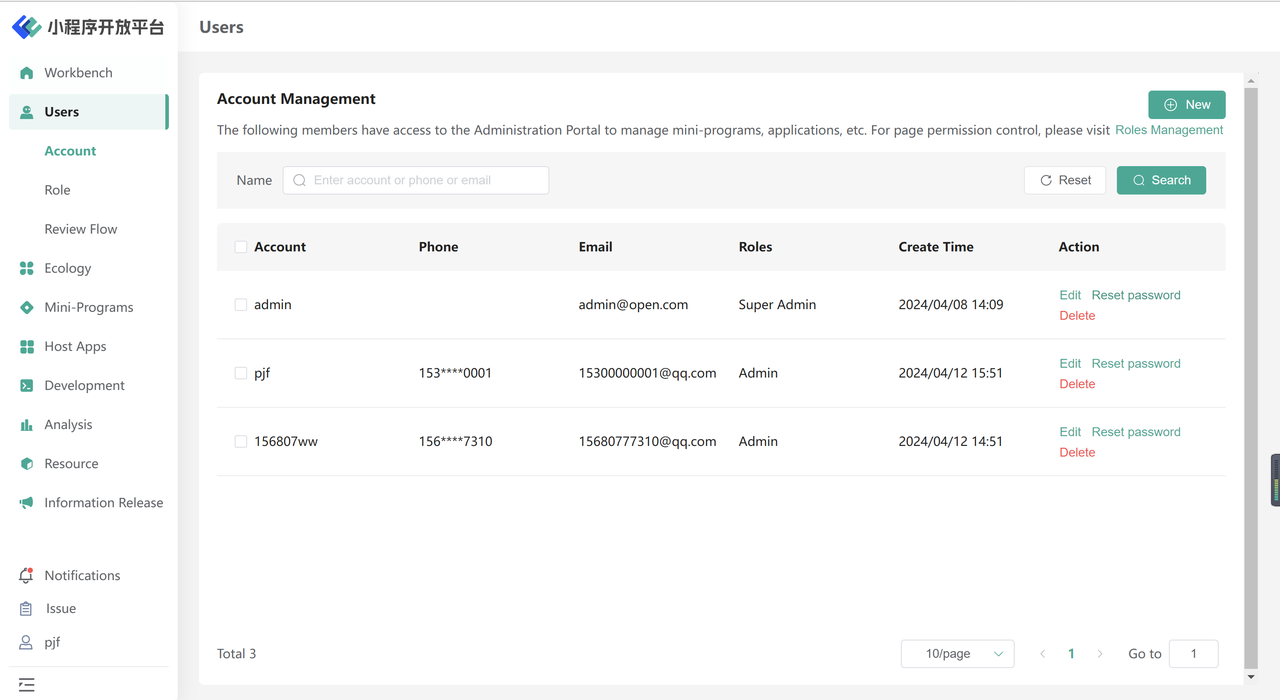
In the Members module, you can set different roles for members of the platform and perform add, delete, edit, and search operations on them.
1.1.1 Role Introduction
Note: The roles here are system default preset roles. You can add custom roles based on business needs, see 1.2 Permission & Roles for operation details.
- Super Admin: The super admin account is generated by the system. Thus, the super admin has permissions for all modules of Administration Portal, and this account cannot be deleted or edited.
- Admin: Admins have permissions for all modules of the Administration Portal. This role cannot be deleted but supports editing.
- Other Roles: Such as Data Analyst, Product, etc., roles can be customized.
1.1.2 Operation Instructions
Add Members
Admins can add other operational members in the 「User Management」 module:
- Click the「New」button on the page;
- Enter the member's username, phone number, email, login password, etc., set their role, and then click「Confirm」 to complete the addition;
- After adding, members can use the corresponding account to log in to Administration Portal's administrative backend.

Delete Members
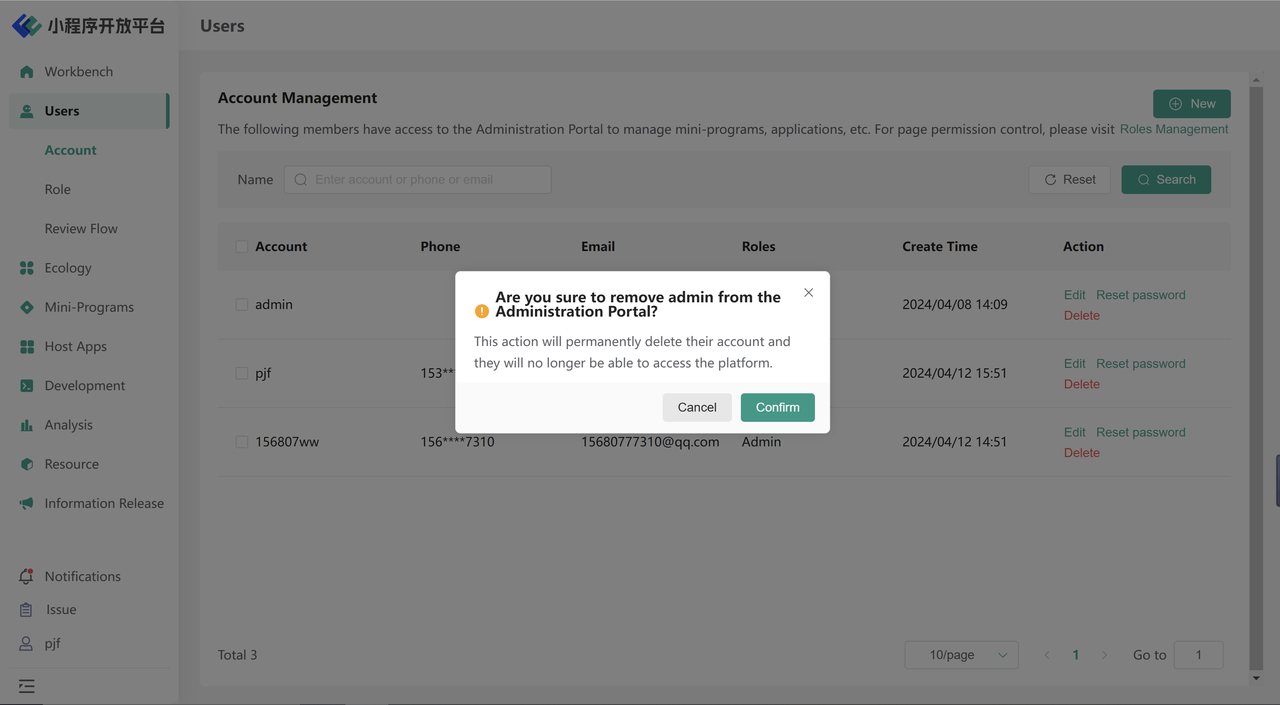
If you need to delete a member:
- You can select multiple members and then click the “Batch Delete” button at the top for batch operations;
- Or click the "Delete" button at the end of a member's entry for individual deletion.
Modify Members
If you want to modify the information of a member:
- You can click the “Edit'” button on the right side of the member to enter the personal information editing page;
- On the personal details page, except for the phone number, which cannot be modified, other information can be edited;
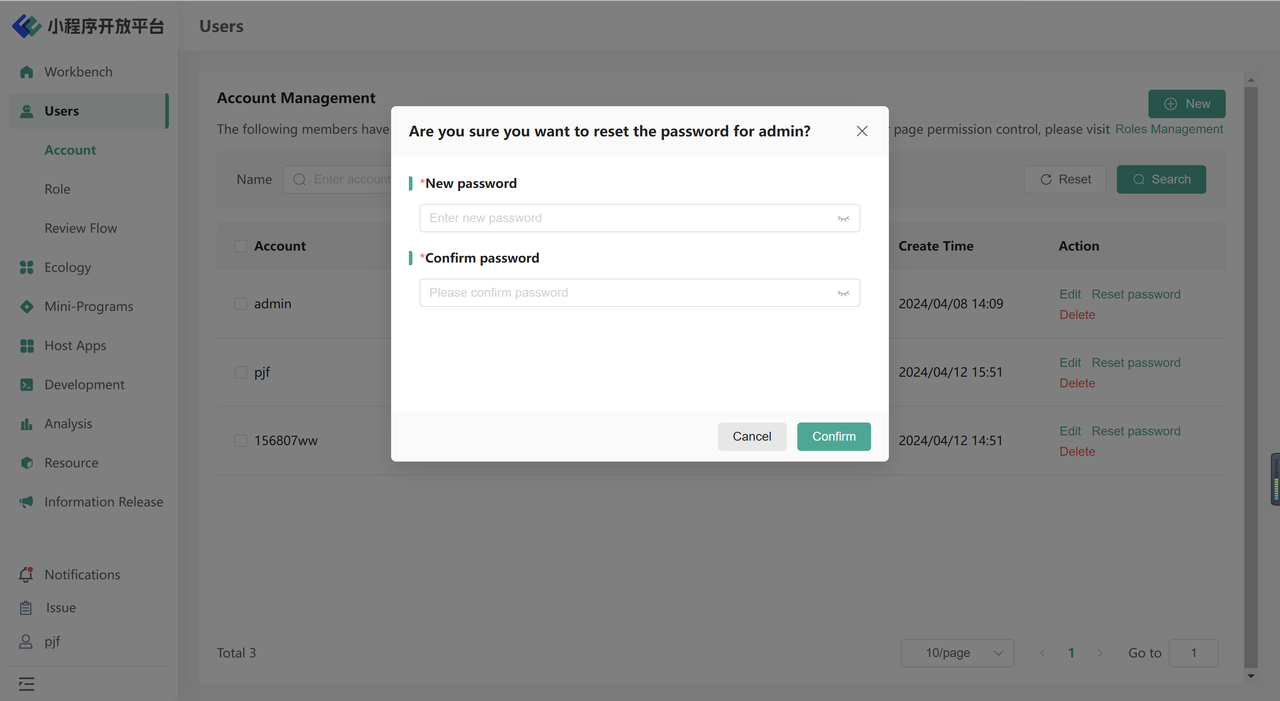
- To reset a member's login password, click the “Reset password” on the list's right side. The default password after resetting is: Abcd@1234;
AWS Safety tips
If you have deployed and installed FinClip through the AWS image, for the first use, you need to access the system via the address http://IP/ops#/, using "admin" as the username and the last 6 digits of the instance-id as the login password. After logging in, you need to reset your login password.
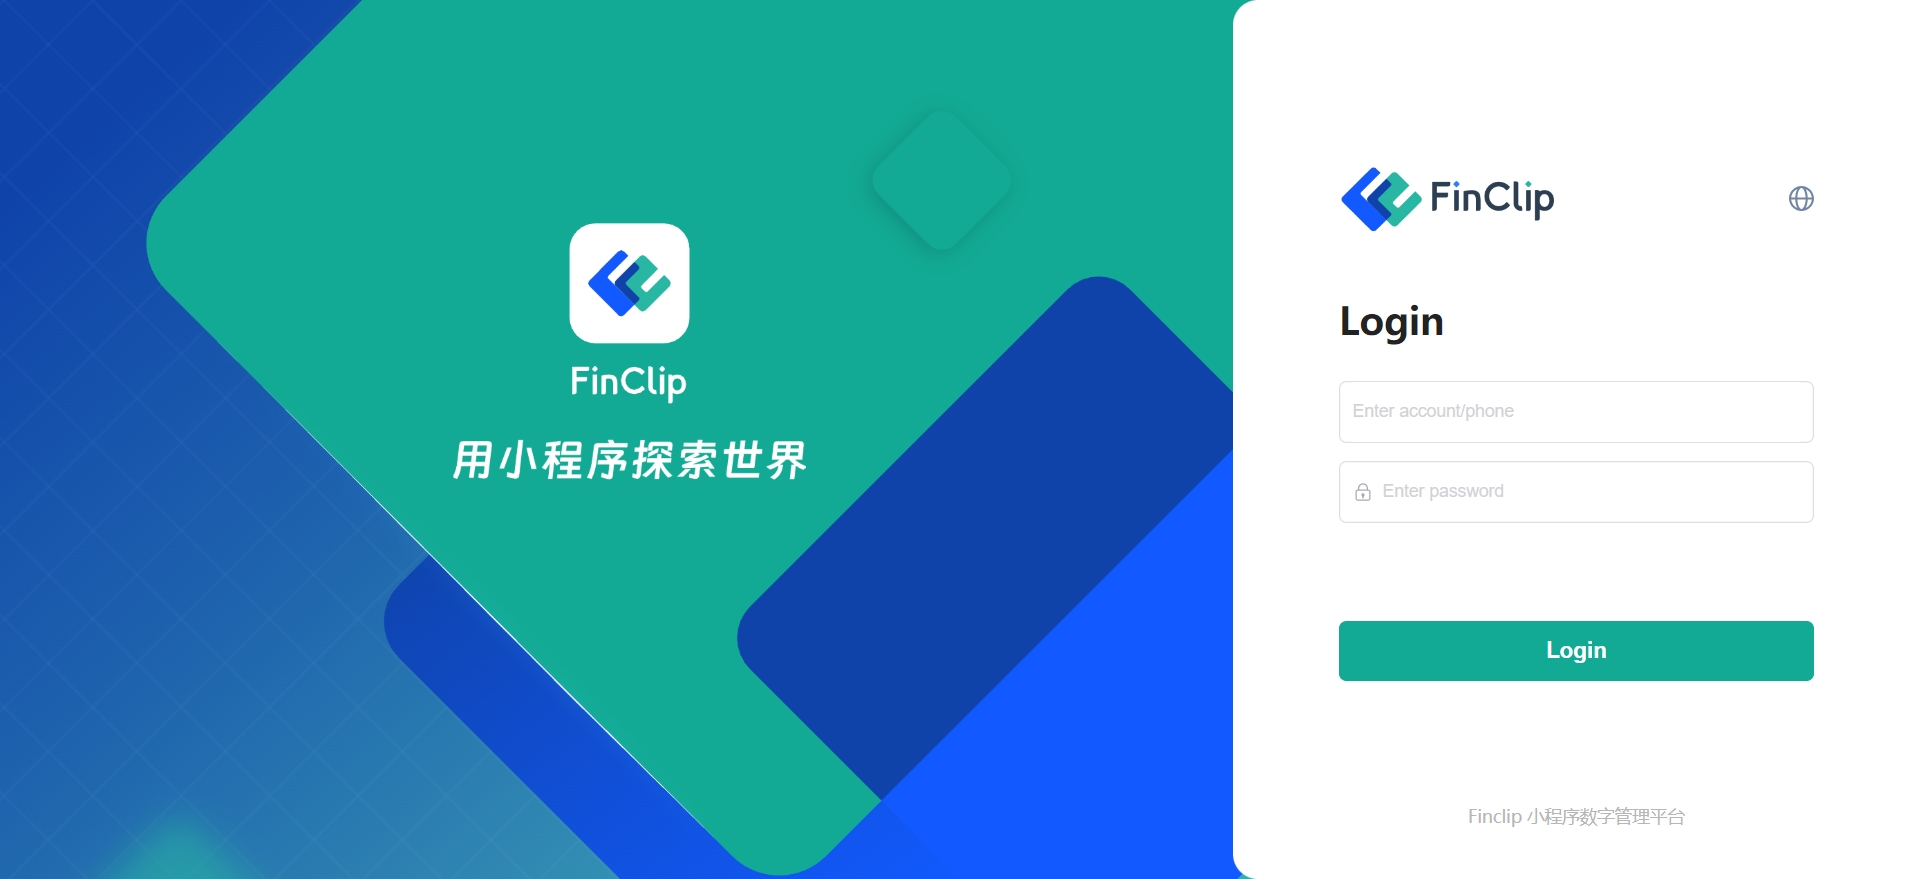
As shown in the figure above, log in to the system with your account and password.
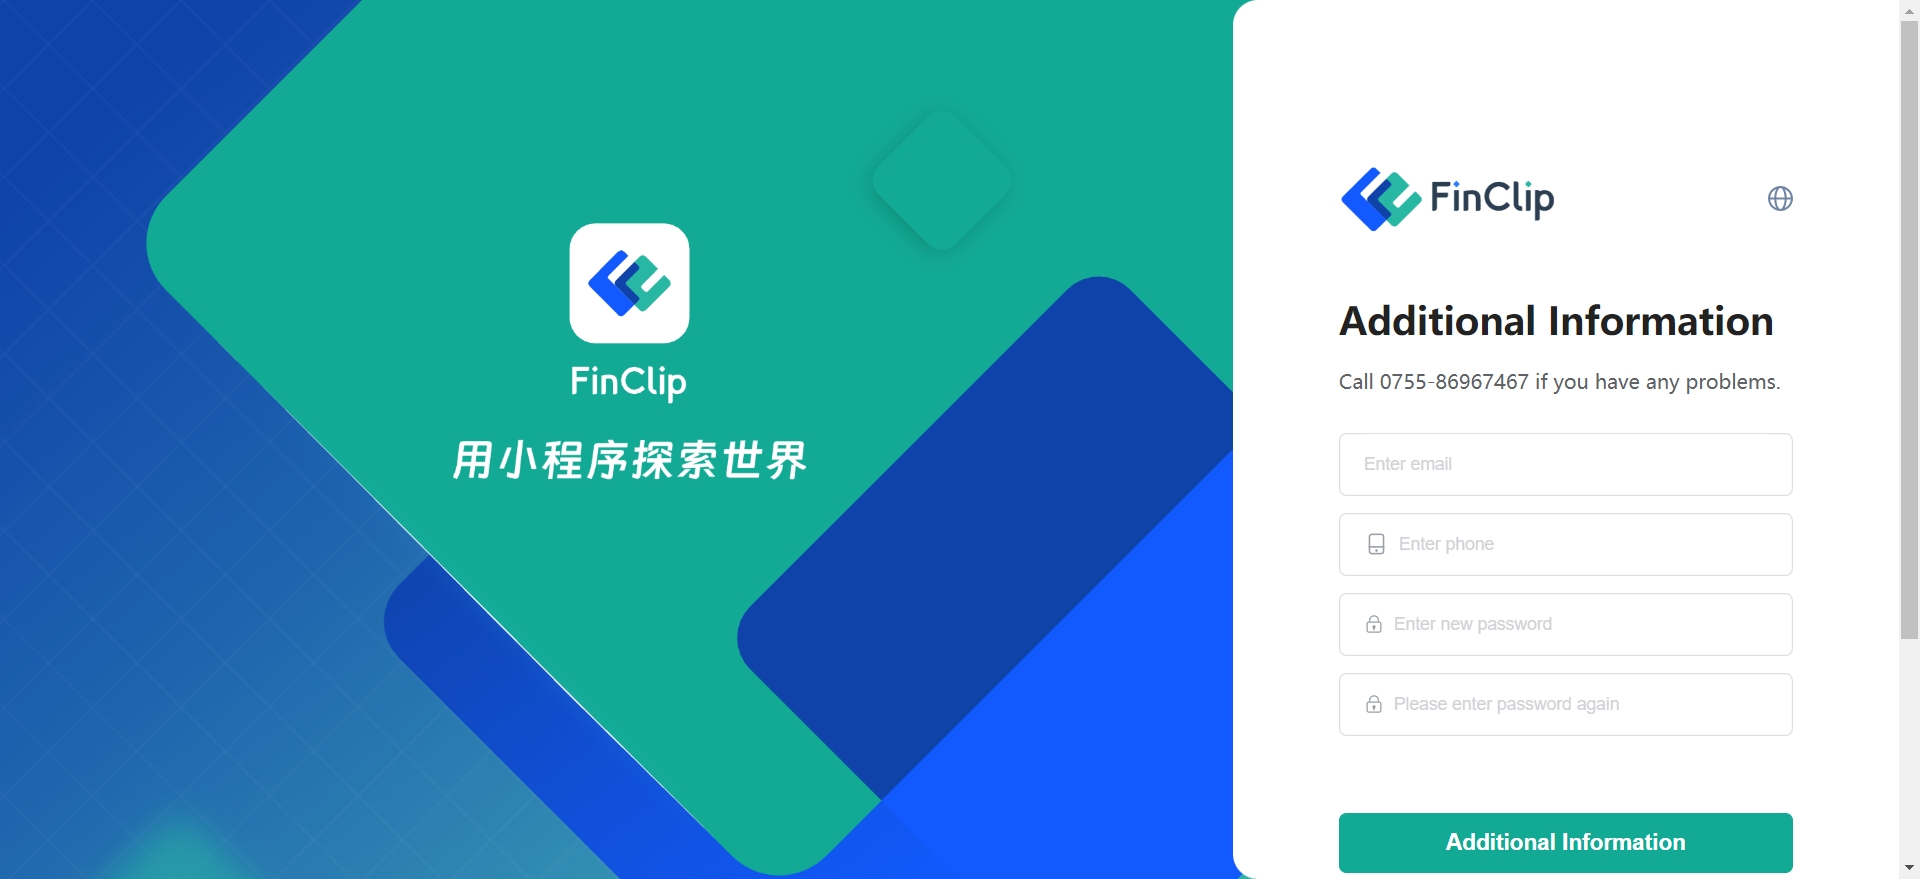
After logging in for the first time, you need to change the default password.
Search for Members
- You can search for members using the search box in the upper left corner of the page;
- Supports searching by username, phone number, and email.
1.2 Role
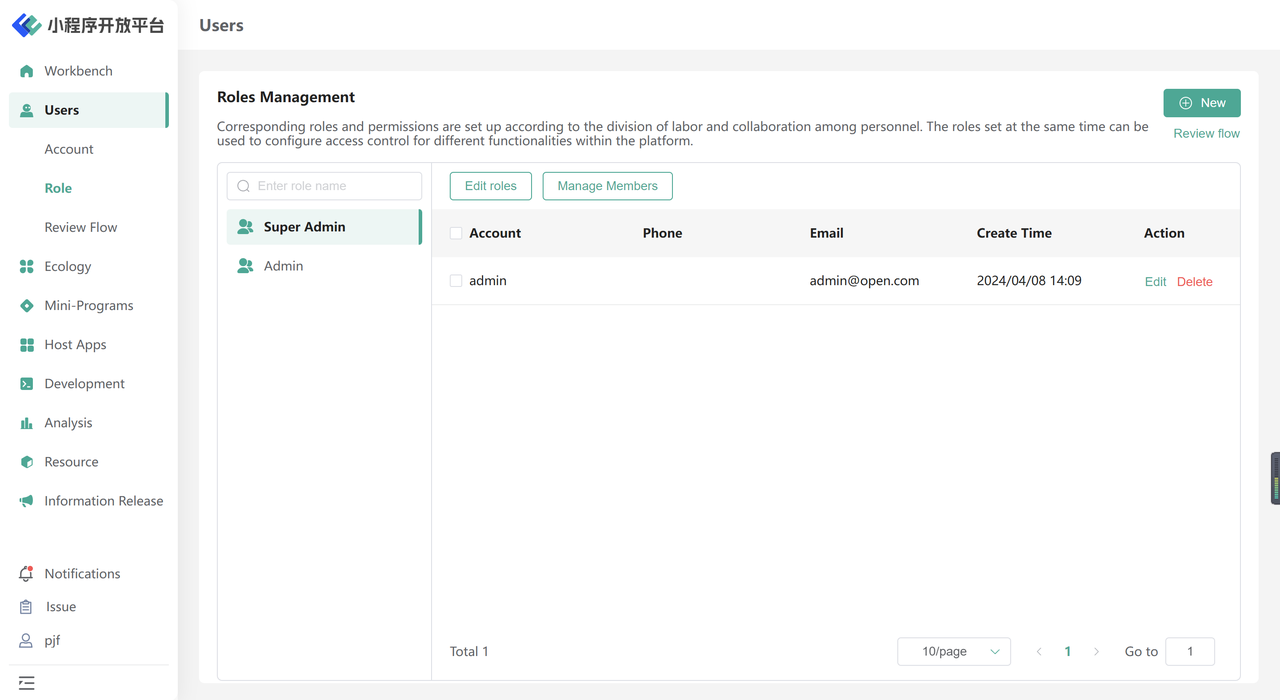
Administration Portal supports customizing roles and configuring permissions, and then assigning roles to employees with different functions to achieve the goal of controlling the permissions of other accounts. The specific operations are as follows:
- Step One: Add a New Role
Click the「New」button on the 「Users - Role」 page.
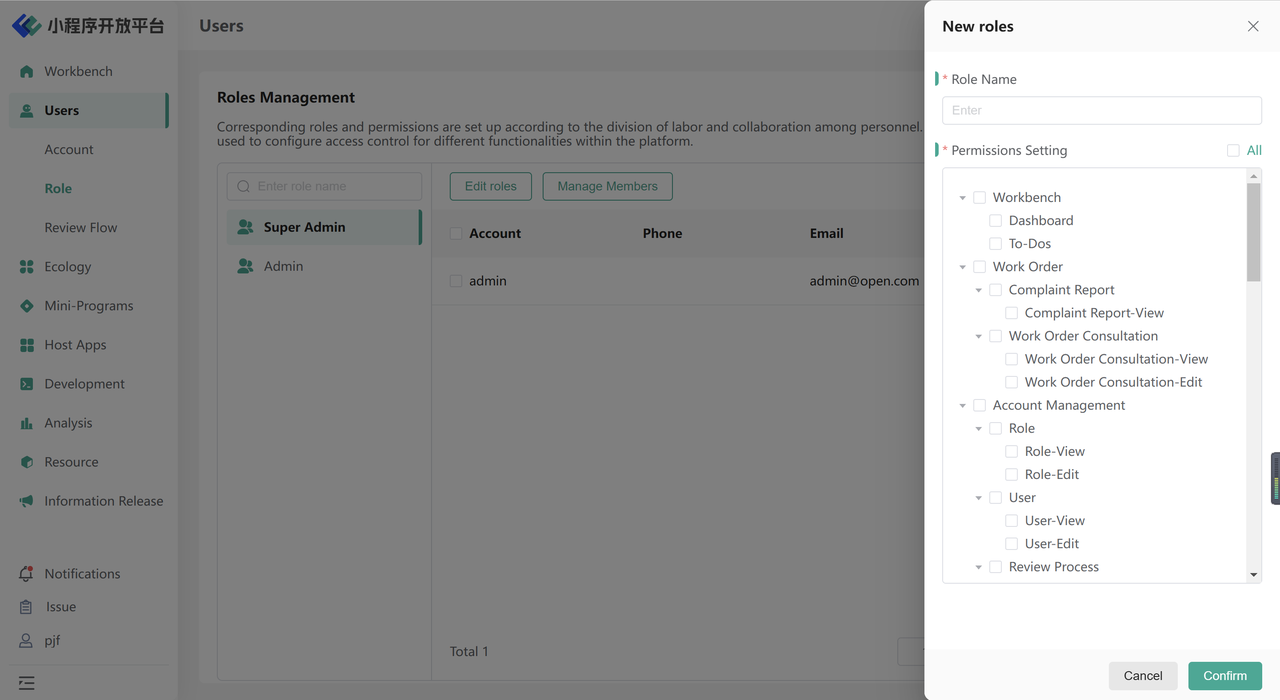
- Step Two: Configure Permissions
Enter the name of the role in the popup, configure the corresponding permissions for the role, and then click save; (Note: The image is for illustration purposes, the permission configuration here should cover all modules)
- Step Three: Configure Role Members
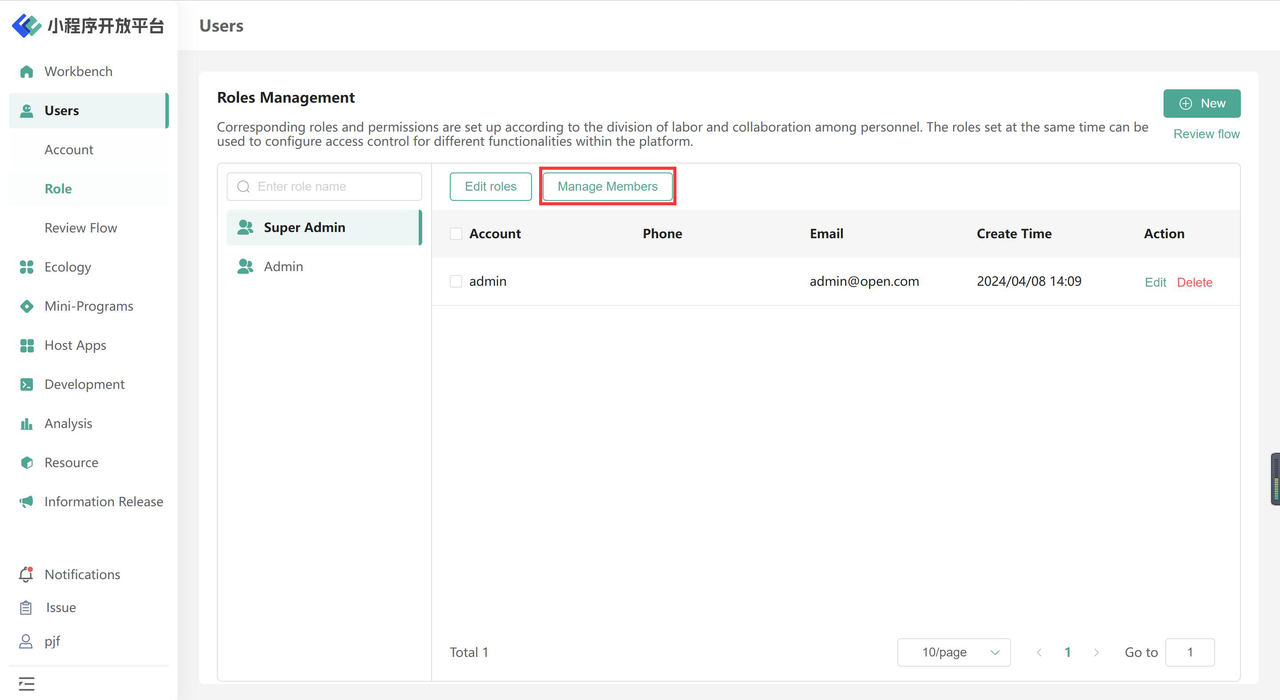
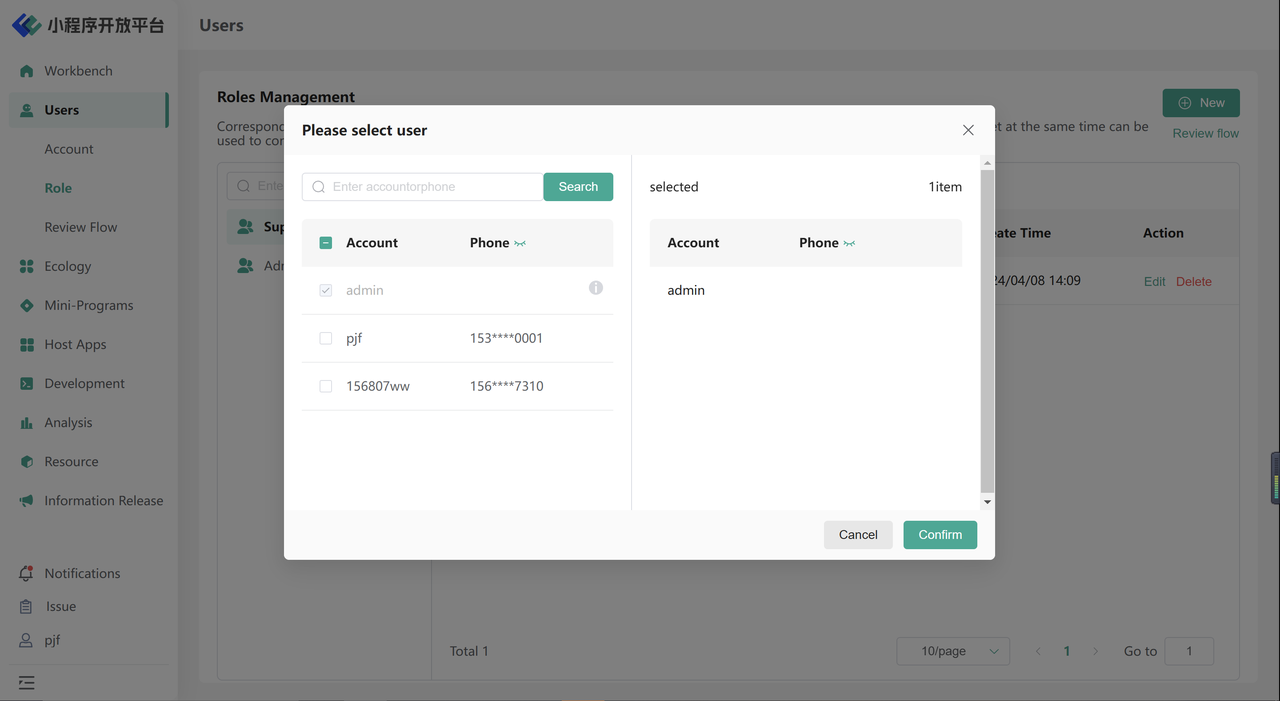
Finally, go to the Permission & Roles page, search for the specific role name, and select 「Manage Members」 to configure the corresponding accounts for that role, as shown below:
- Step Four: Configuration Success, Role Login
When an account with a configured role logs into the platform, it will only have the functional permissions allocated to that role. Any unassigned functional permissions will not be visible or will be prohibited from operation. However, it's important to note that if an account has multiple roles, the account's permissions will be the union of the permissions of all those roles.
1.3 Review Flow
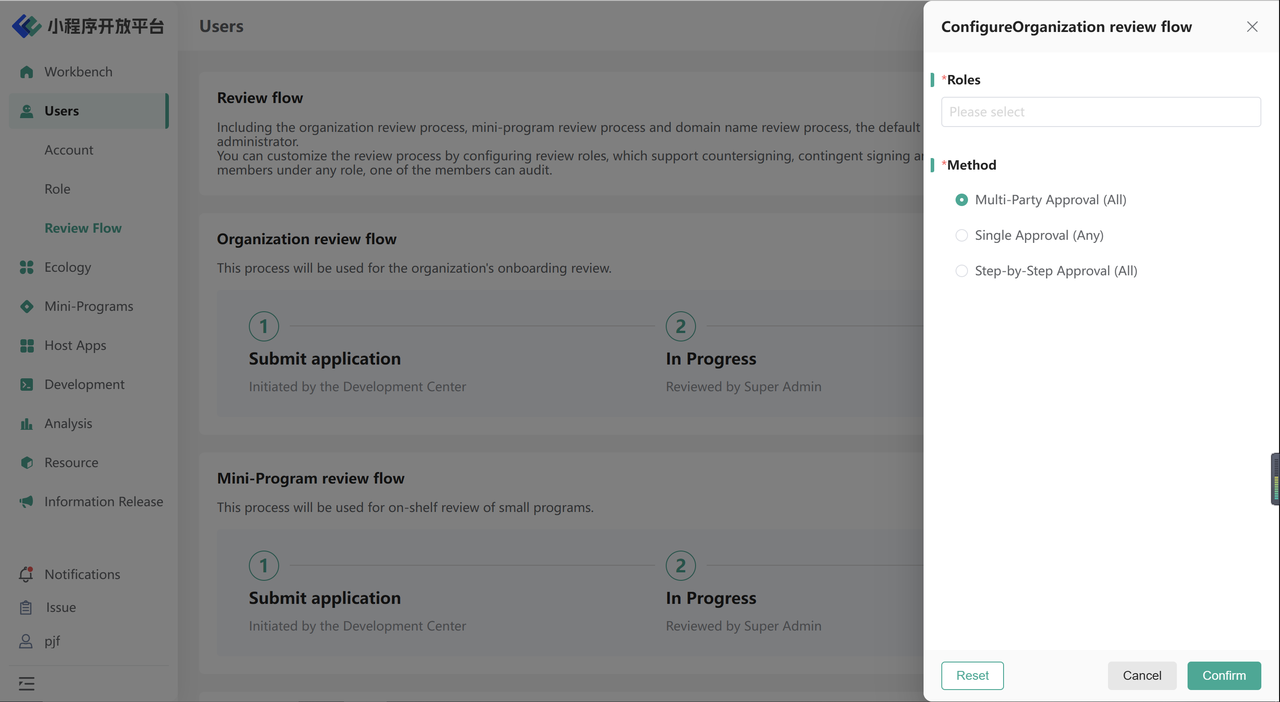
The review configuration in Administration Portal currently includes the enterprise entry review flow, mini-program publishing review flow, and domain review process, all of which are by default the responsibility of the super admin. The review flow can be customized by configuring review roles, supporting joint signing, alternative signing, and sequential approval methods.
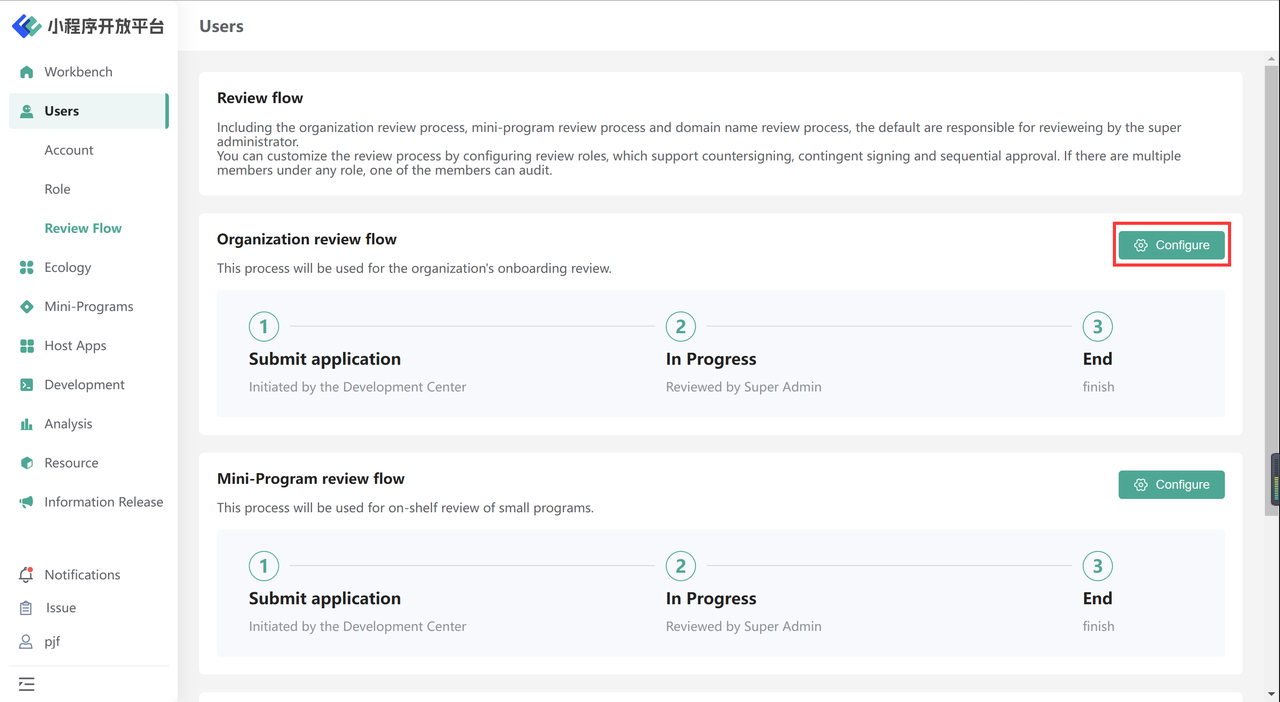
Taking the enterprise entry review process as an example, the main operational steps are as follows:
By default, the admin account conducts the review.
Custom process: Enter the configuration page through the 「Configure」function, select the review role and method of review, and it becomes effective immediately upon submission.
- If there are multiple members under a role, the review is considered passed if one of the members approves.
- Multi-Party Approval: Approval by all roles.
- Single Approval: Approval by one of the roles is sufficient.
- Step-by-Step Approval: Approval by all roles in order.
Reset: Supports resetting the review process to 'review by admin account'.
Notes on Edge Cases in Configuration Verification Flow
When configuring the verification flow, if all roles are unchecked, the verification process will default to be audited by the super administrator (admin account).
On the basis of the original verification flow, if a new role is added, members under the new role cannot audit historical pending tasks (e.g., for a mini-program submission with a submission time of 12:00, if member A is added to the verification flow at 14:00, member A will not be able to see the pending mini-program for verification).
2.Ecology
2.1 Organization
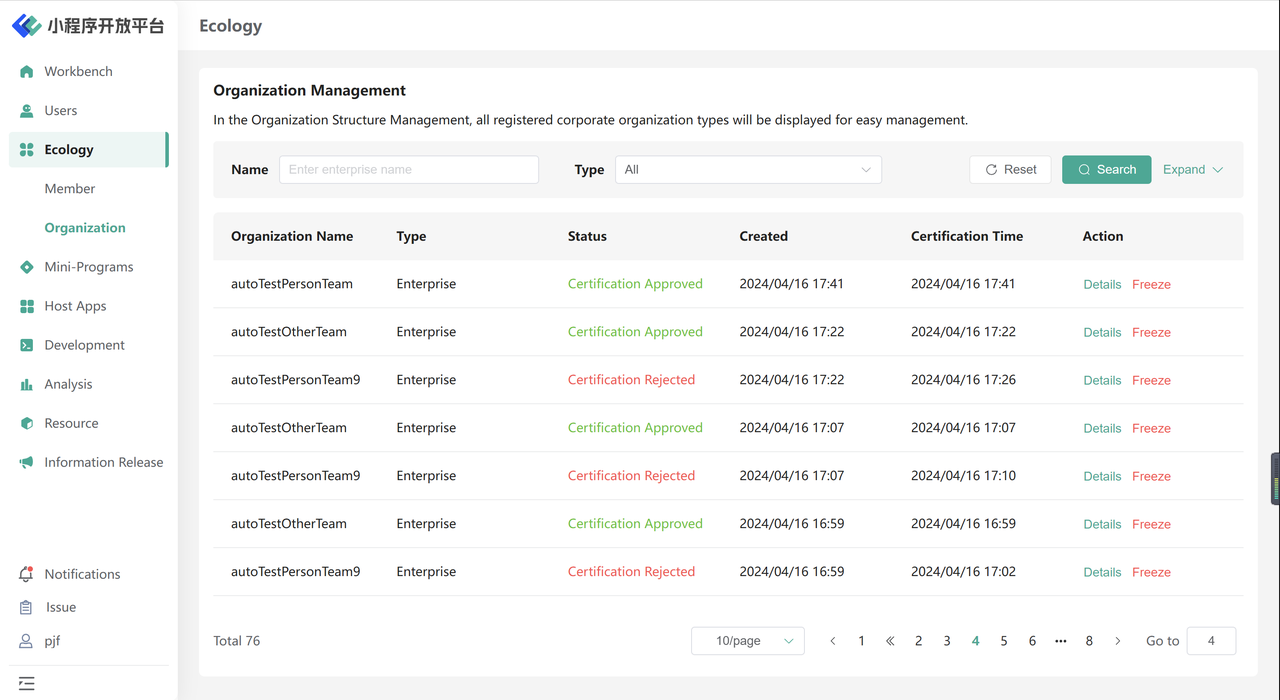
Operational personnel can view the certification status of all registered enterprises or organizations in the organizational structure management. The certification status is divided into:
- Certification Approved:Indicates that the enterprise's certification review has been approved.
- Certification Rejected:Indicates that the enterprise's certification review has been rejected.
- Certification in Process: Indicates that the enterprise's certification review has been submitted but not yet reviewed.
- Expired: Indicates that the enterprise's certification has expired (certification is valid for one year) and needs to be re-certified.
- Frozen: Indicates that the enterprise has been frozen and cannot use related functions.
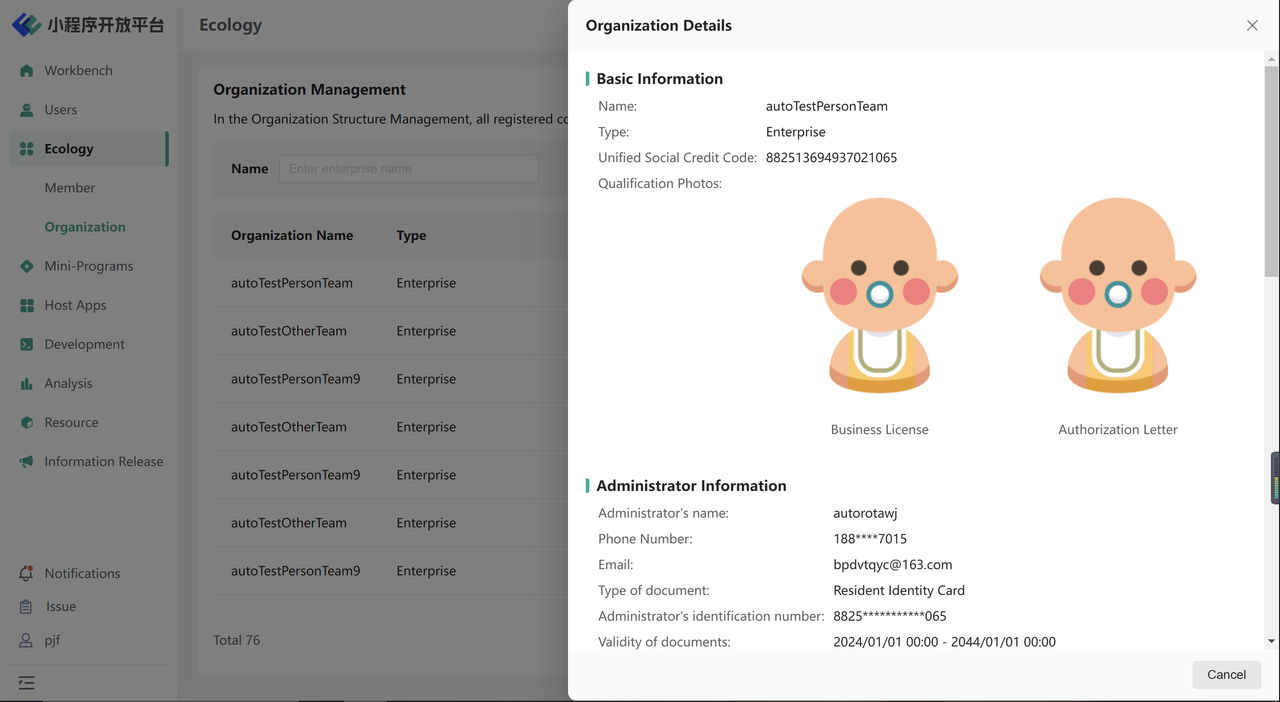
Clicking on 「Details」 allows you to view specific information about a particular enterprise. If the enterprise is not certified, you can either approve or reject the certification. If the enterprise is already certified, you can choose to freeze or unfreeze it after freezing.
2.2 Member
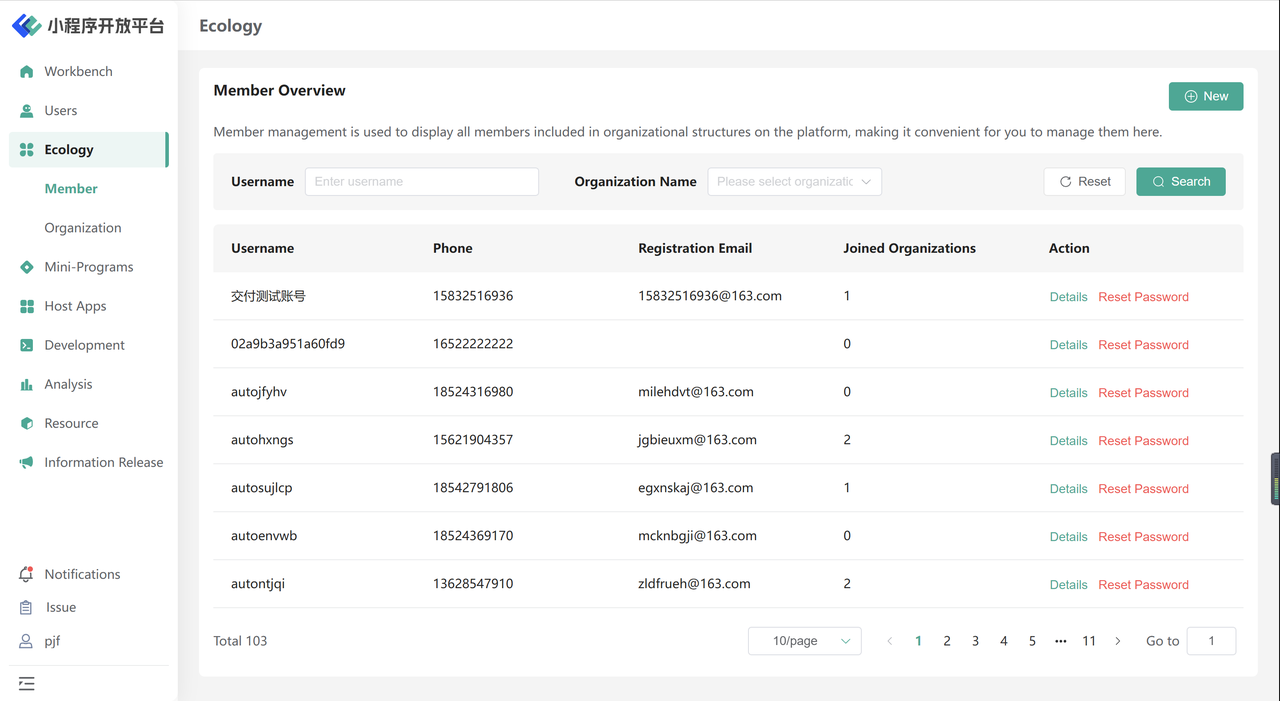
Operational personnel can view all organizational members and reset member passwords in the member section.
3.Mini-Programs
3.1 Mini-Programs
In the mini-programs module, you can perform operations such as setting up mini-program release audits, viewing mini-program information, and taking mini-programs offline. Here is a specific example:
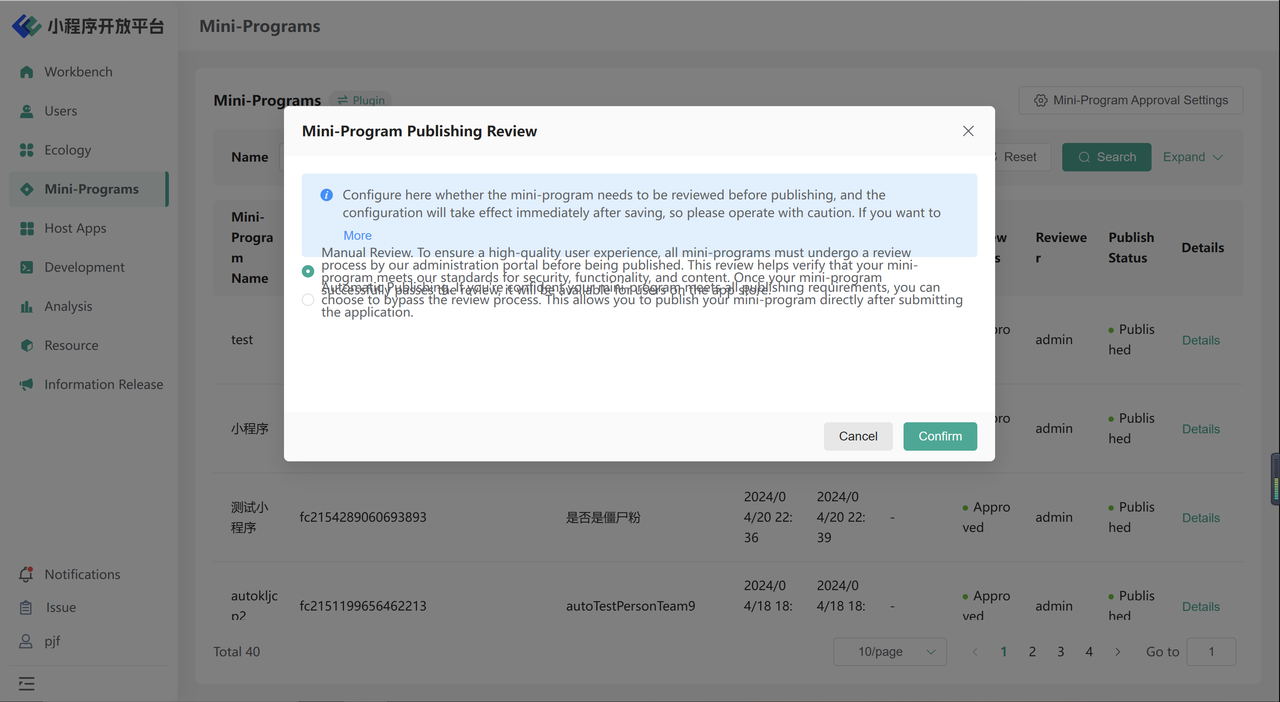
3.1.1 Approval Settings
Clicking “Mini-Program Approval Settings” on the mini program list page allows you to set up the release audit operation for mini programs. The options are as follows:
- Can be audited by the Developer Portal itself.
- Must be audited by the Administration Portal (Note: The audit flow can be configured separately; for detailed operations, refer to Users - Review Flow).
3.1.2 View Mini-Program Information
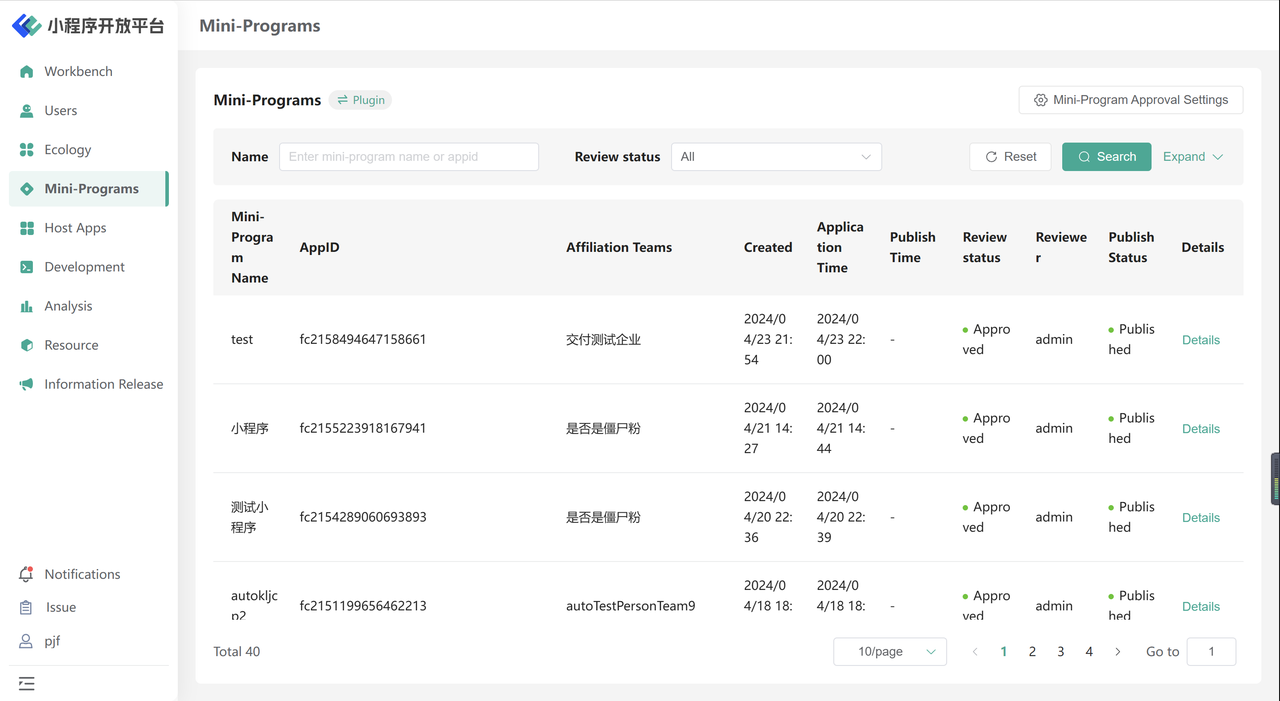
You can retrieve and view mini-program information by using the corresponding filtering components at the top. This allows for efficient retrieval and viewing of mini-program details.
3.1.3 Unpublish Public Mini-Program
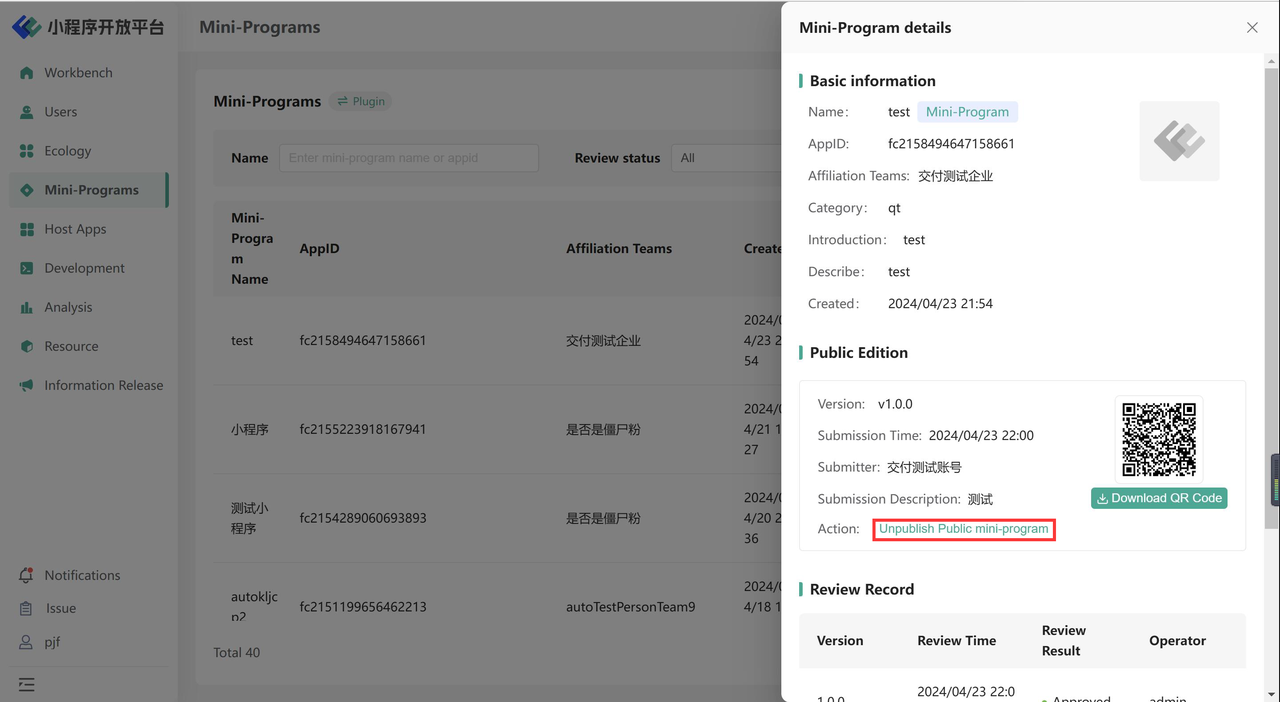
On the mini-program details page, you can perform the offline operation for a mini-program that is already online. For placing a mini-program online, you will need to proceed to the Workflow for approval.
4.Host Apps
4.1 Host Apps
Applications on Administration Portal side display information about applications created by both Developer Portal and Administration Portal. Operational personnel can create applications on Administration Portal side and set how these applications are displayed on Developer Portal side, as well as whether they are automatically associated with mini-programs.
4.1.1 New Host App
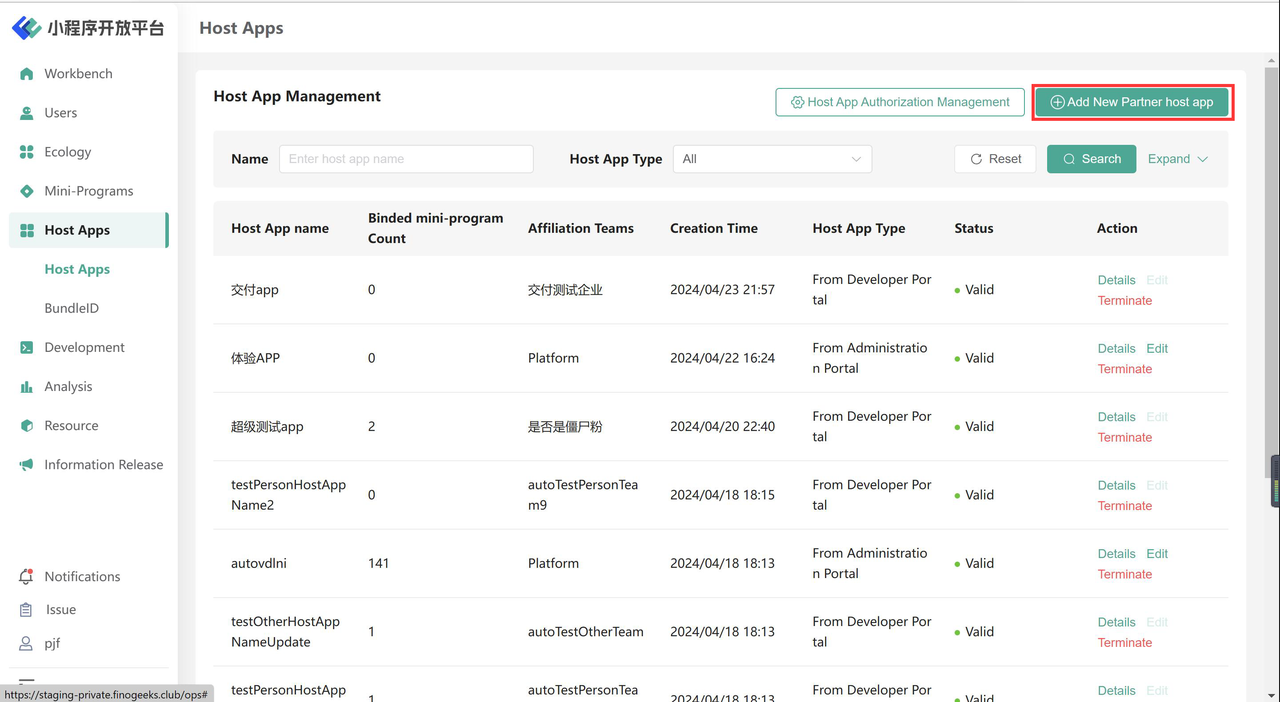
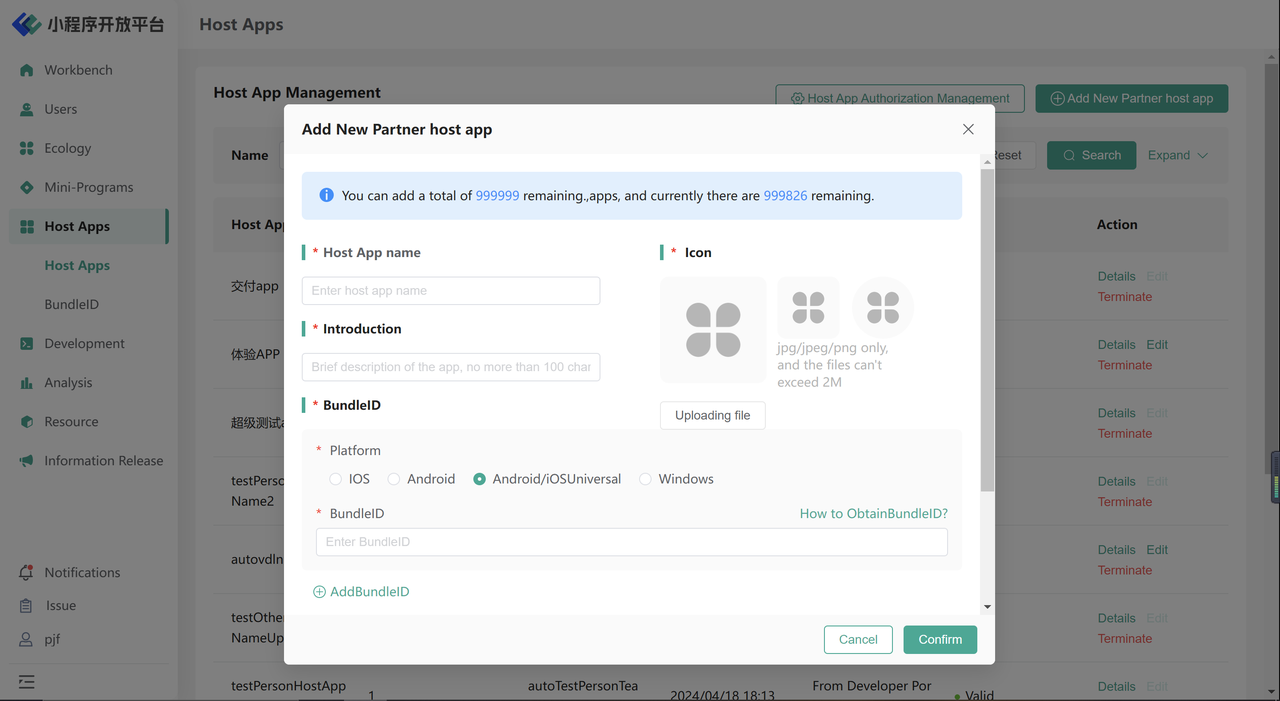
Clicking 「Add New Partner host App」 on the Host App page allows you to set basic information such as application name, description, icon, Bundle ID, and more. Additionally, you can also set whether the 「Users from Developer Portal can see the BundleID」 and whether the 「The host app automatically associates with mini-programs」.
4.1.2 View and Manage Application Details
Administration Portal can view comprehensive application information globally. You can use filtering criteria to query the application information that needs to be managed.
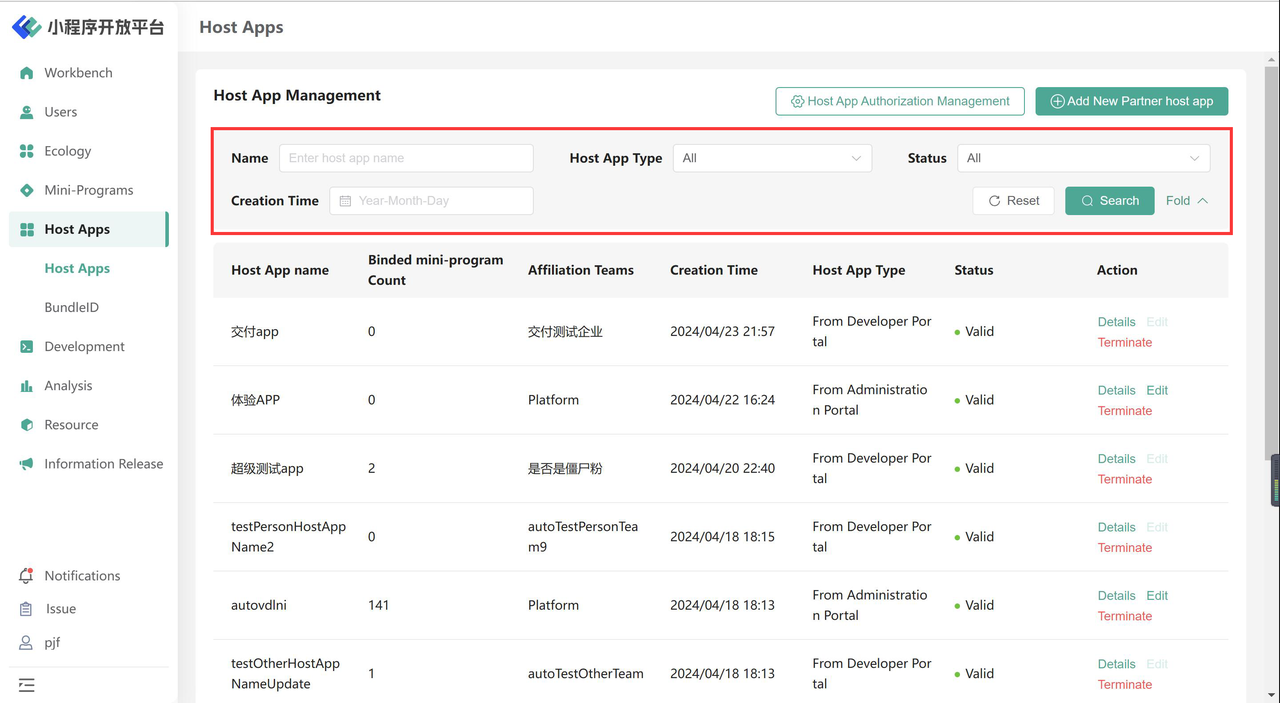
But depending on the source of application creation, there are distinctions in the corresponding operations generated by Administration Portal:
| Create app in the Developer Portal | Create app in the Administration Portal | |
|---|---|---|
| Enable/Disable app | ✅ | ✅ |
| View mini-program information/API information/Menu information | ✅ | ✅ |
| Add new Bundle ID | ✅ | ❌ |
| Disable Bundle ID | ✅ | ✅ |
| Add/Edit API | ✅ | ❌ |
| Disable API | ✅ | ✅ |
| Stop calling the approved API | ✅ | ❌ |
| Add/Edit Menu | ✅ | ❌ |
| Disable Menu | ✅ | ✅ |
| Stop calling the approved Menu | ✅ | ❌ |
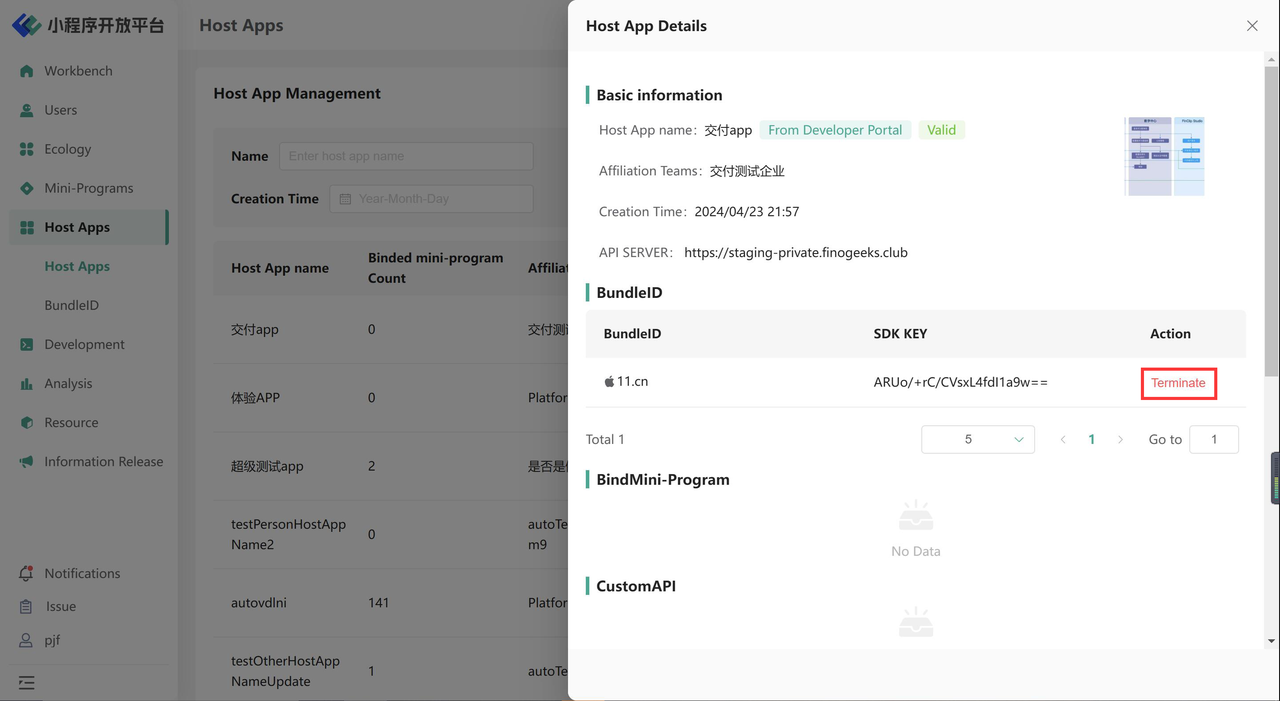
Additional Explanation: Applications created by Administration Portal support custom creation of APIs and menus, as well as their respective management. If mini programs under other applications want to request access to APIs or menus, they can apply for approval directly at the specific API/menu (approval can also be done in the Workflow). Additionally, if an API or menu that was previously approved needs to be discontinued, you can go to the application's API/Details and click on 「Terminate」
4.1.3 Host App Authorization Management
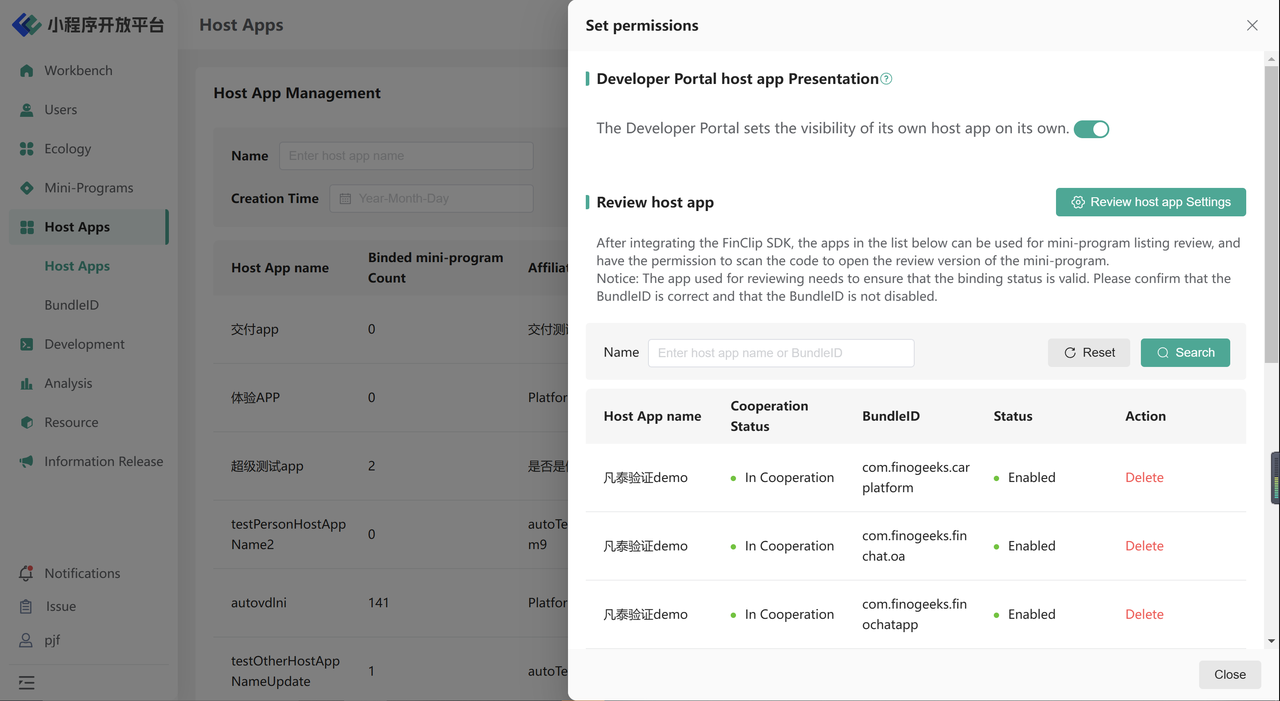
By clicking on 「Host App Authorization Management」 on the application list page, you can perform 「Developer Portal App Settings」and「Review App Settings」.
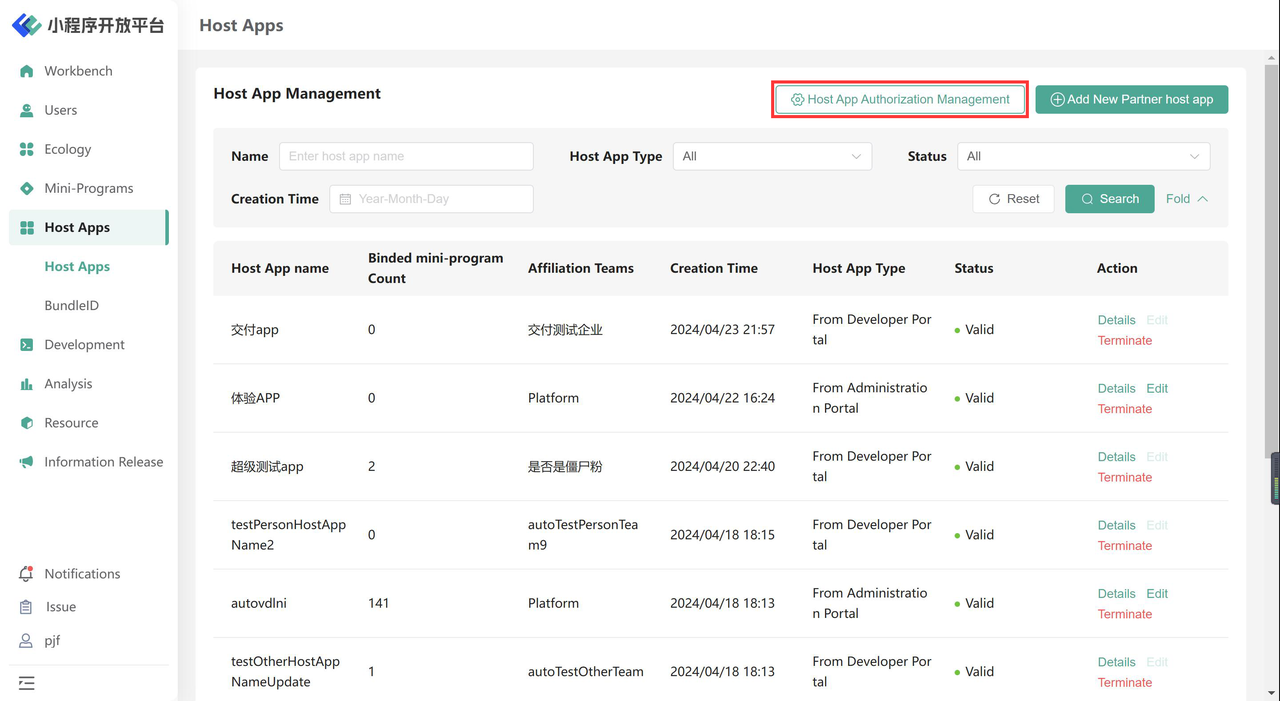
- Developer Portal App Settings: When the switch is turned on, Developer Portal can independently set the visibility and Bundle ID display status of the application.
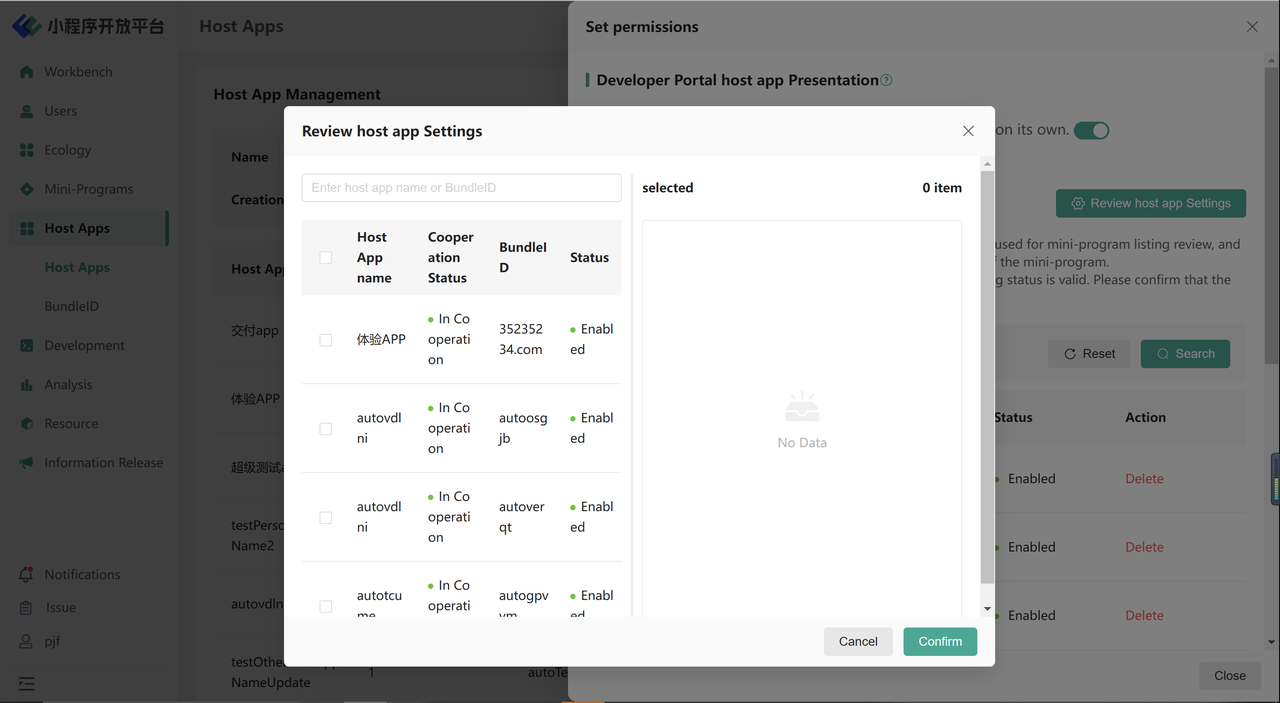
- Review App Settings: Here, you can select specific applications created by Administration Portal and set them as audit applications. Audit applications, when integrated with the FinClip mini-program SDK, can be used for mini-program review and approval. They have the permission to scan and open the review version of mini-programs. Applications designated for audit purposes must ensure that their cooperative status is normal. If you intend to use an audit application, please verify that the Bundle ID is correct and active.
4.2 Bundle ID
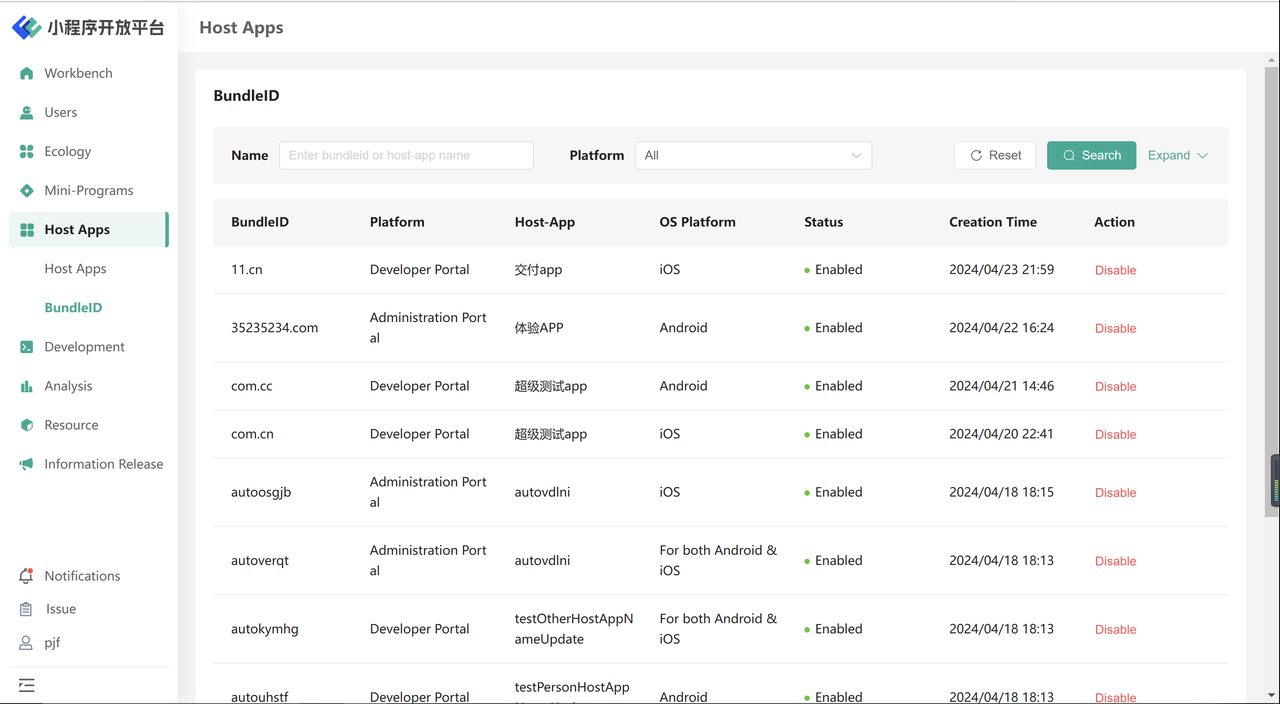
You can manage Bundle IDs created by both Administration Portal and Developer portal here, enabling you to disable, enable, or perform other actions related to them.
5.Development
5.1 Domain
In certain business scenarios, mini-programs need to access specific domains. To ensure the security of data requests made by mini-programs, the mini-program platform provides the 「Domain」 feature, allowing administrators to configure domains. Once configured successfully, the mini-program can access the specified domains.
5.1.1 Configure Block/White Lists
Open the configuration window through the 「Manage Domains」 feature. Currently, the platform supports HTTP protocol (http/https) and WebSocket protocol (ws/wss). The configuration applies to second-level domains and above using an asterisk. Domain configurations typically take effect within 10 minutes after being set.
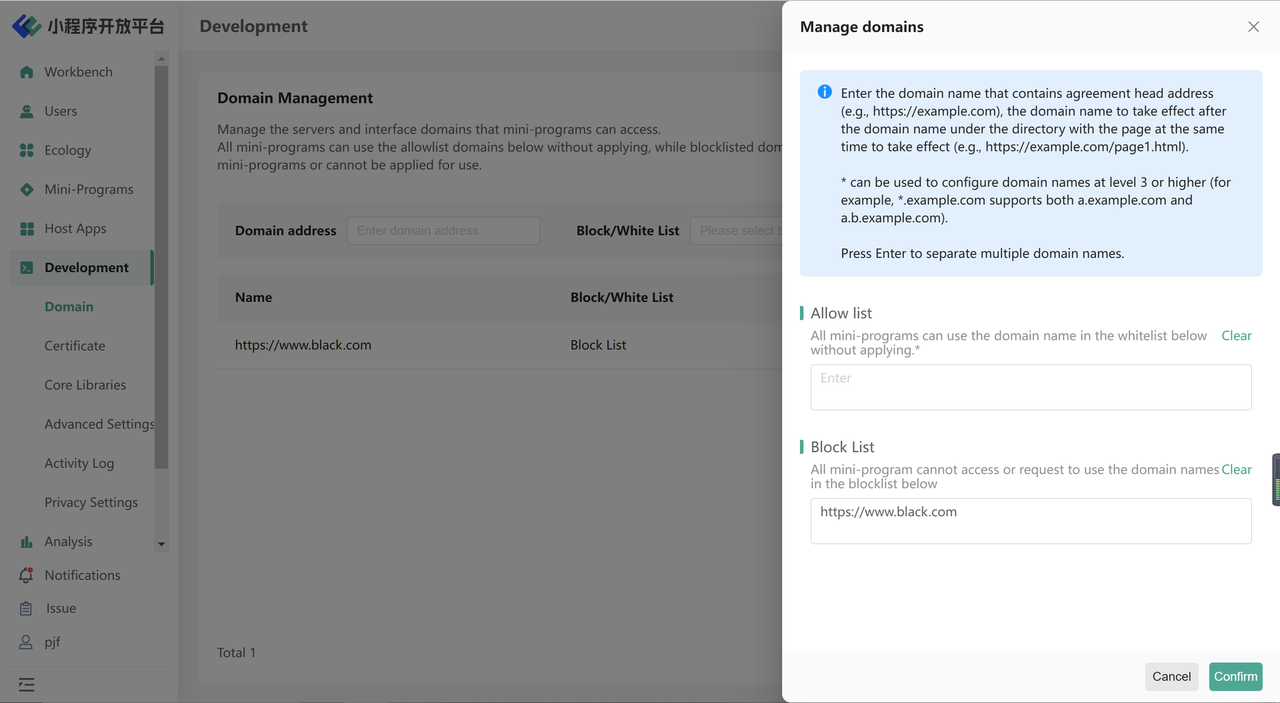
Please note: Blocklisted and Allowlisted domains currently do not support configuring root domains. However, after configuring a domain, all directories and pages under that domain will take effect simultaneously. For example, both https://example.com/page1.html and https://example.com/page will be active once https://example.com is added.
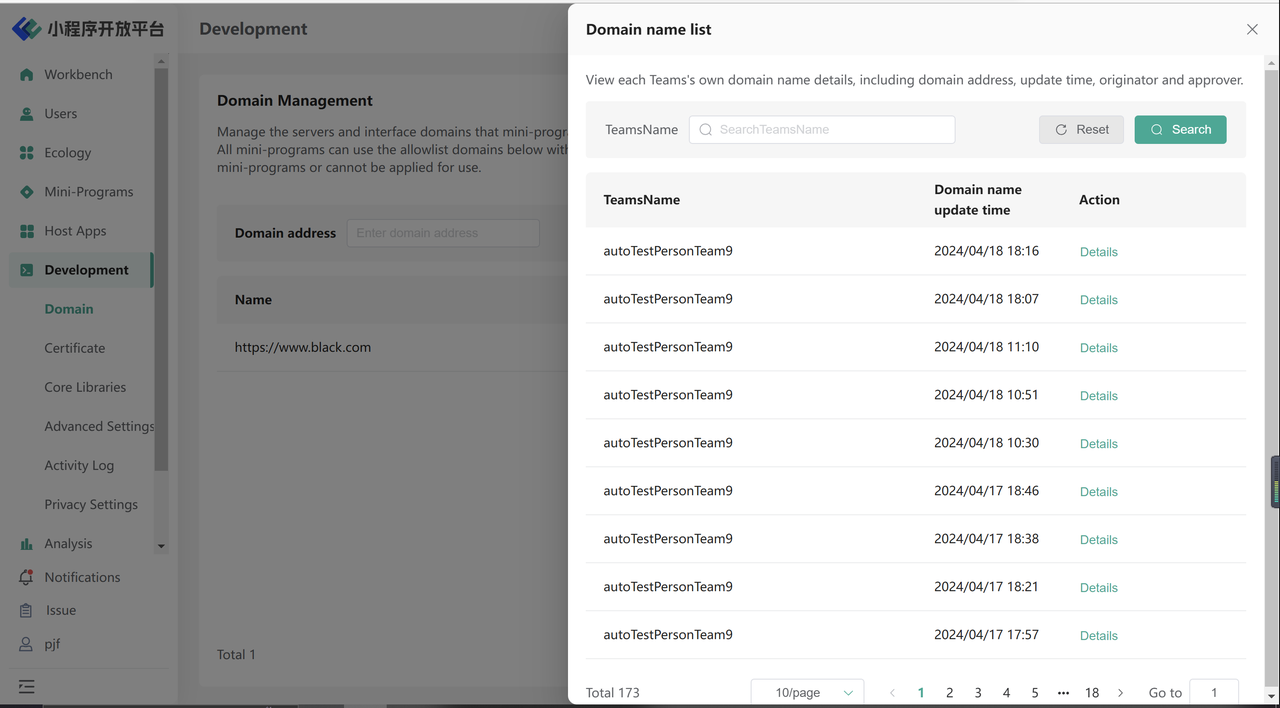
5.1.2 View Team Domain List
Navigate to the organization list page via 「View Domain List」, click on the details of any organization to view all domains.
5.1.3 Review Settings
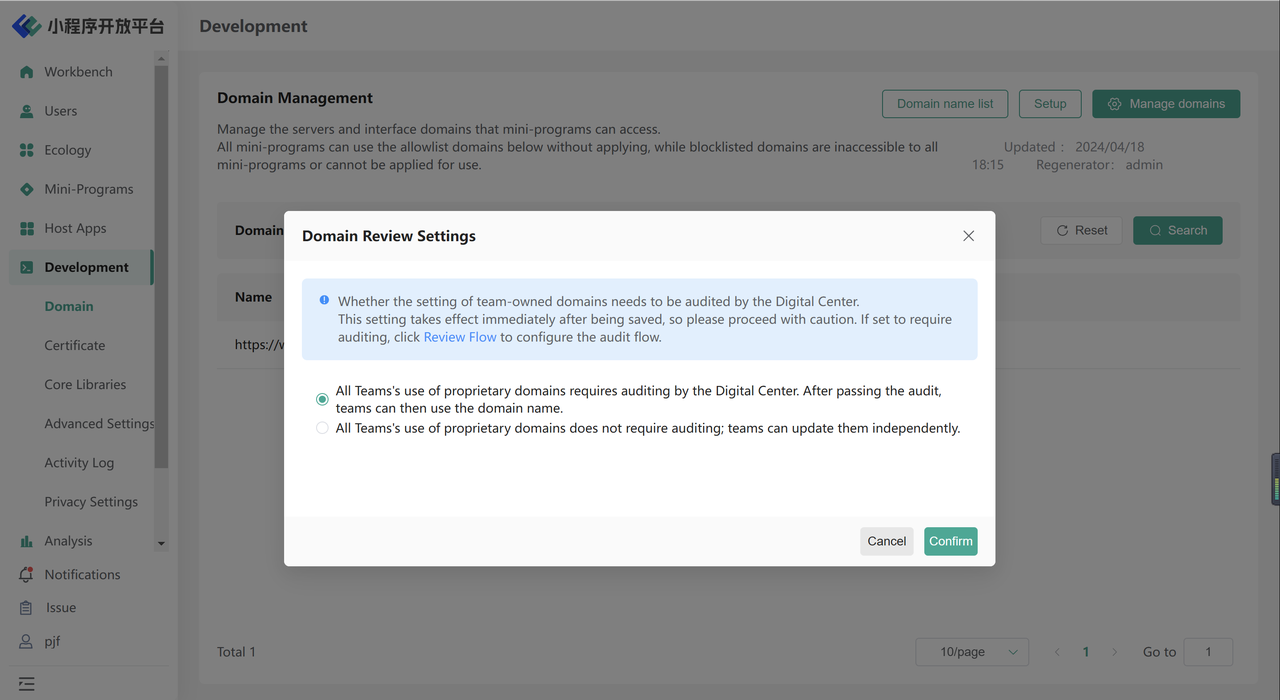
Through the 「Setup」 function, configure whether the domain usage of each organization in the Developer Portal needs to be reviewed by the Administration Portal, with the default setting being no review required.
5.2 Certificate
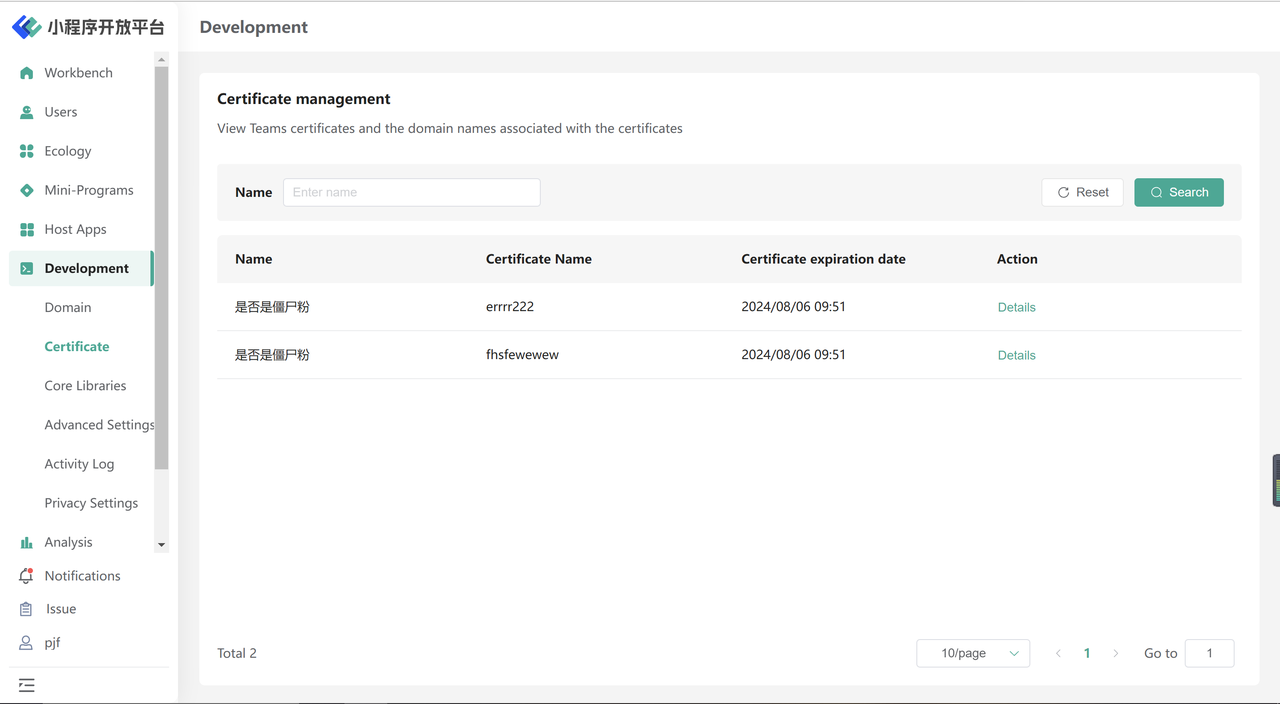
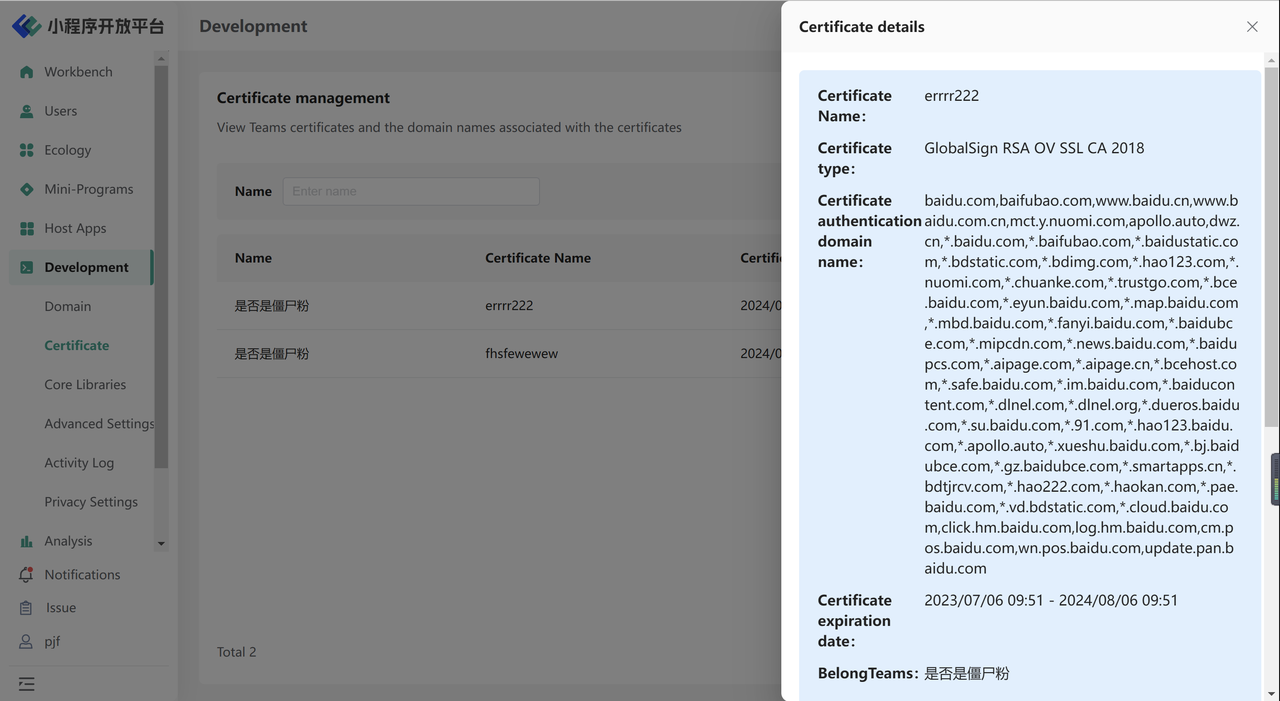
On the Developer Portal side, the Mini-Program platform provides the functionality to upload certificates to associate with domains. Correspondingly , the Administration Portal provides the functionality to view certificates.
5.3 Core Libraries
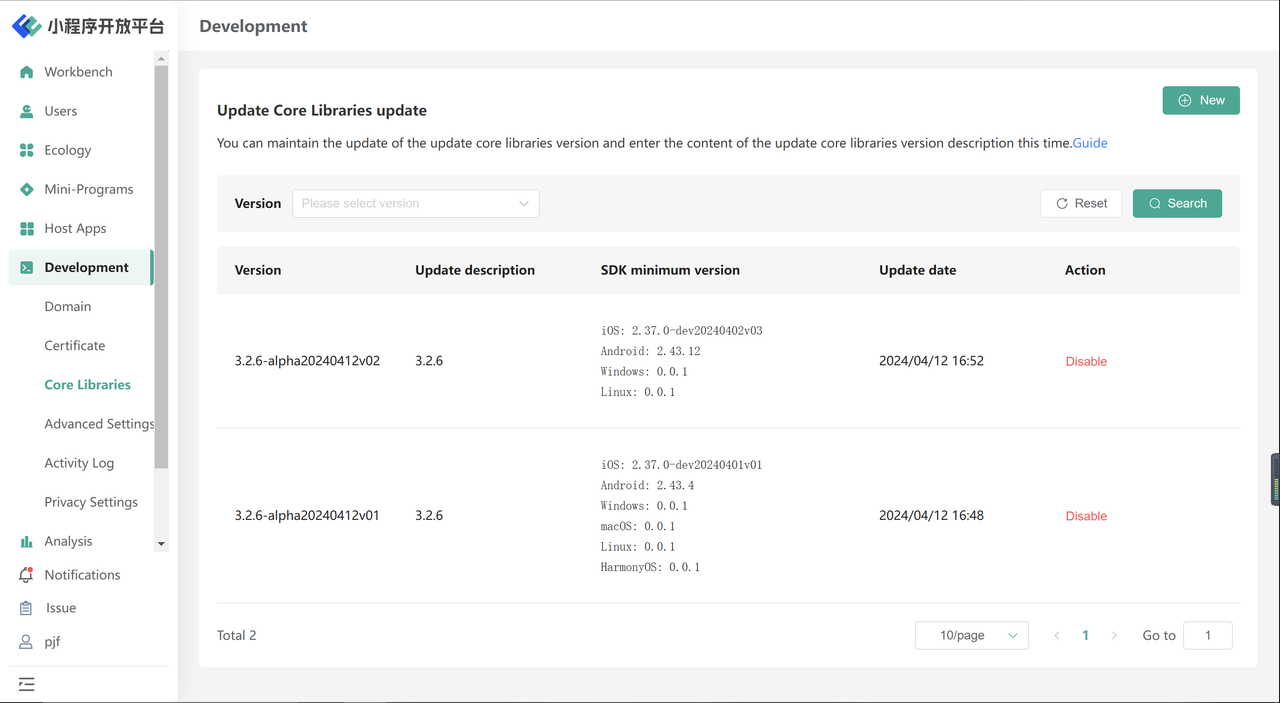
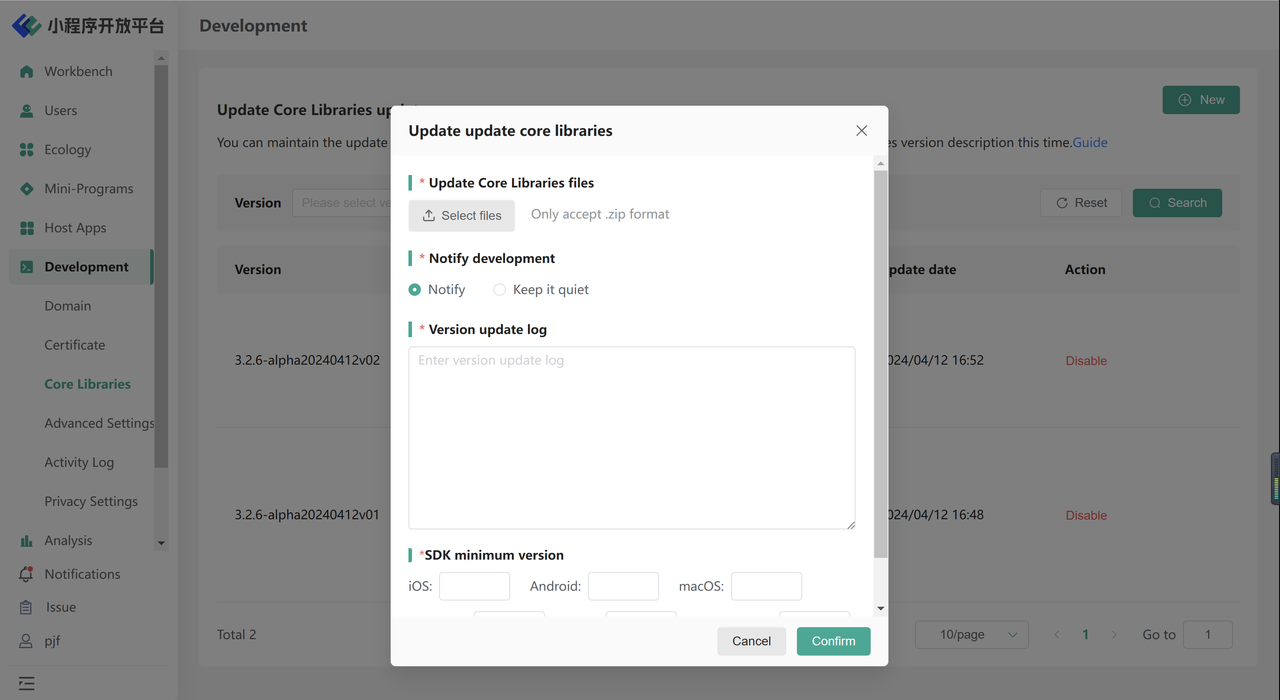
- Updates to the Mini-Program base library can be completed on this page. Click 「Enable」 to apply the update in real-time.
- Click the 「Enable」 button to upload the base library code package.
- When uploading the base library, simply select the base library zip package; there is no need to manually enter the version number (the server will automatically read the version number from the zip package).
5.4 Advanced Settings
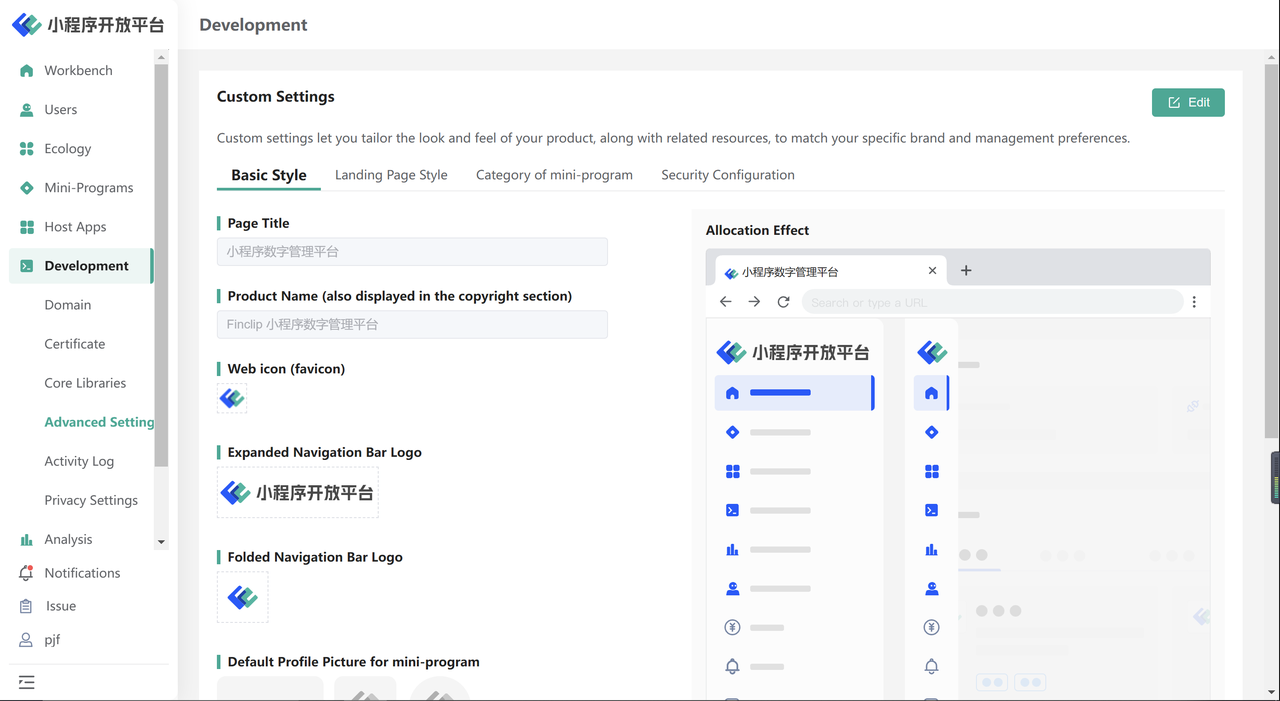
Here you can customize the following content: product basic styles, registration and login page styles, Mini-Program categories and tags, and product security configurations.
5.5 Activity Log
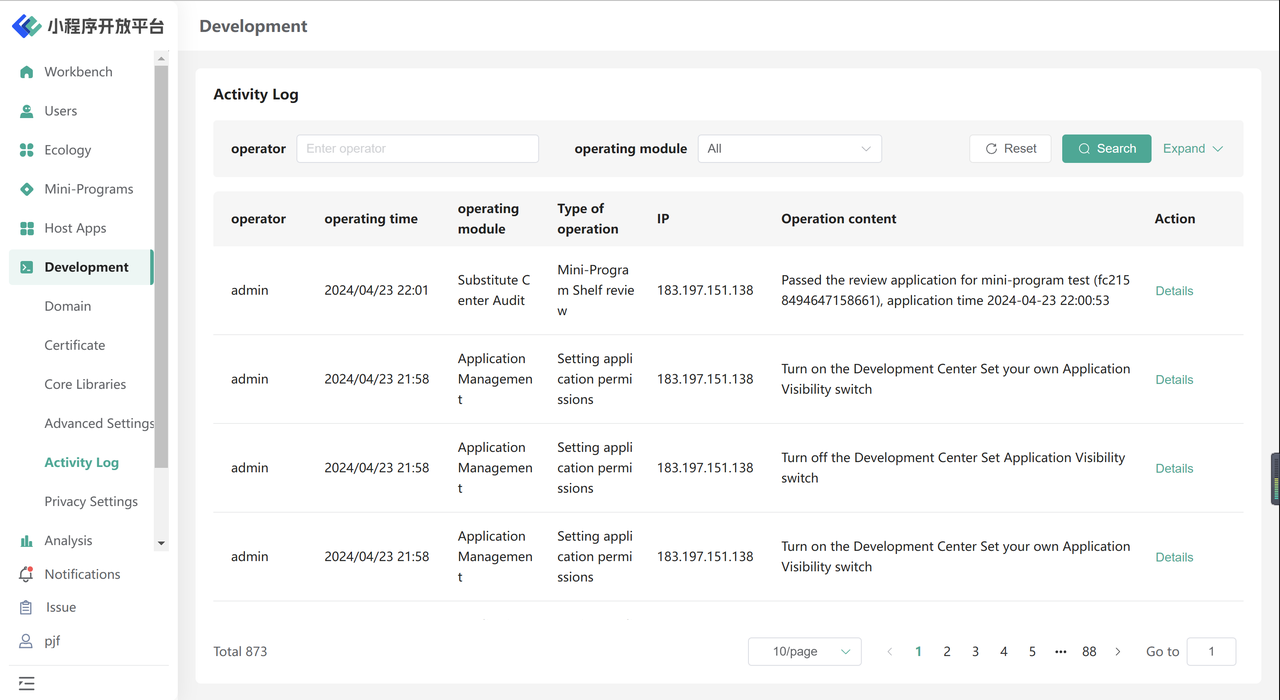
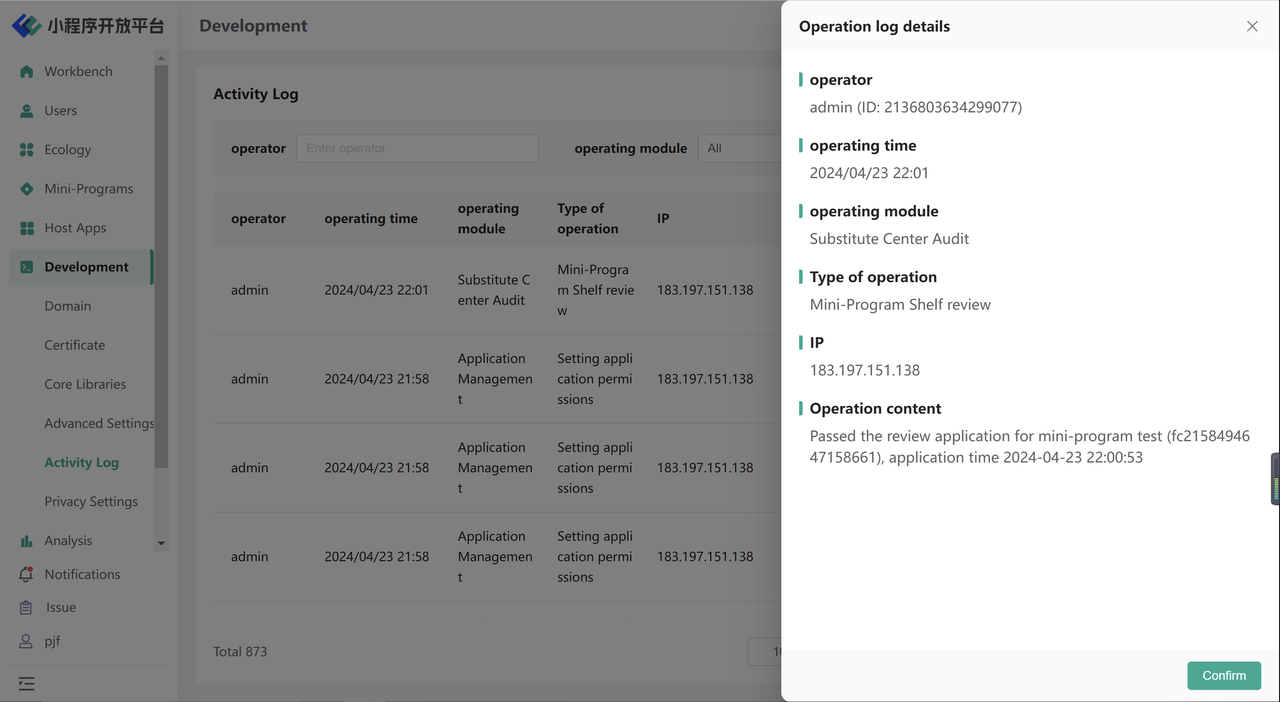
In the 「Activity Log」 page, you can filter operators and functional modules according to your needs to facilitate global operation log viewing. Meanwhile, by clicking "Details", you can view specific operation details, including the type of operation, time, data changes before and after the operation, and other information. (Note: The Digital Center will additionally record some data generated by operations in the Development Center, such as team ownership transfer.)
6.Work Order
6.1 Inquiry Feedback
Clicking on "Details" on the Work Order list page allows you to view the corresponding ticket submission information and replies. Within the dialogue box, you can reply to or supplement the ticket. You can also upload additional attachments for clarification. If you consider the issue to be invalid or the ticket resolved, you can click 「Close Ticket」

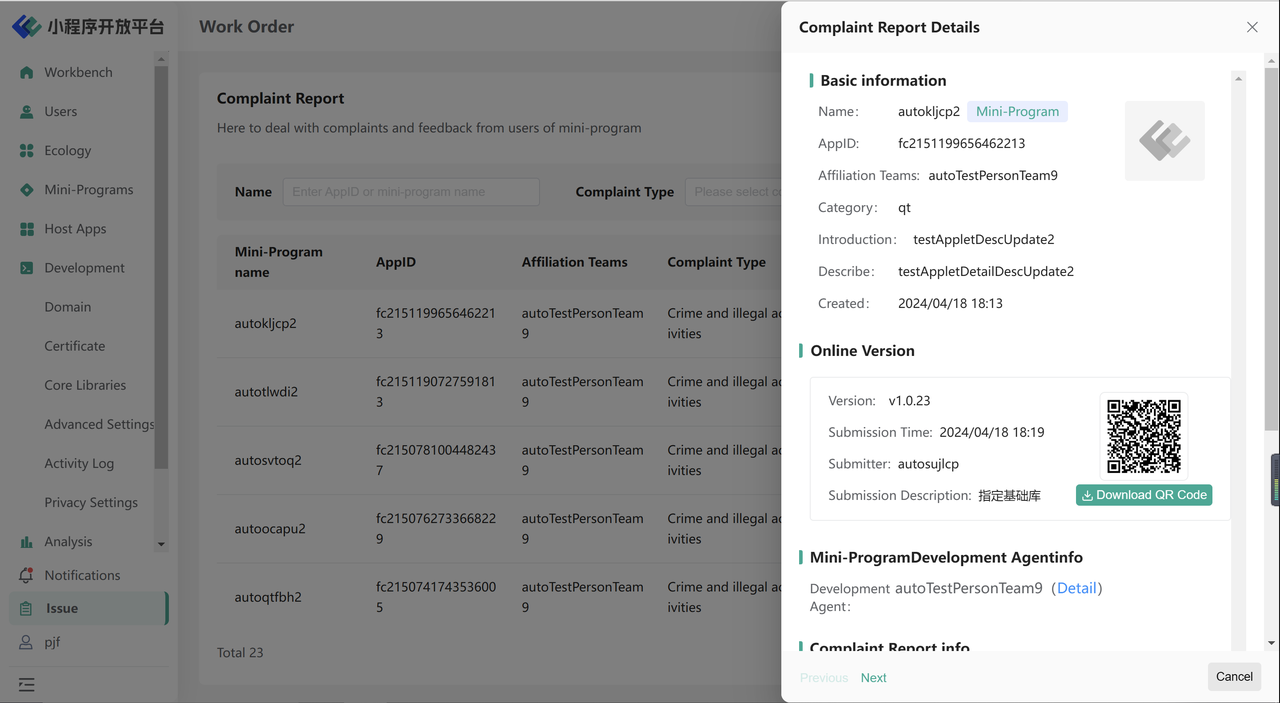
6.2 Complaint Reporting
The mini program SDK provided by the Open Platform offers an entrance for collecting user feedback or complaint reports. Clicking on the "..." in the top left corner of the mini program will reveal the entrance, as shown in the following image:
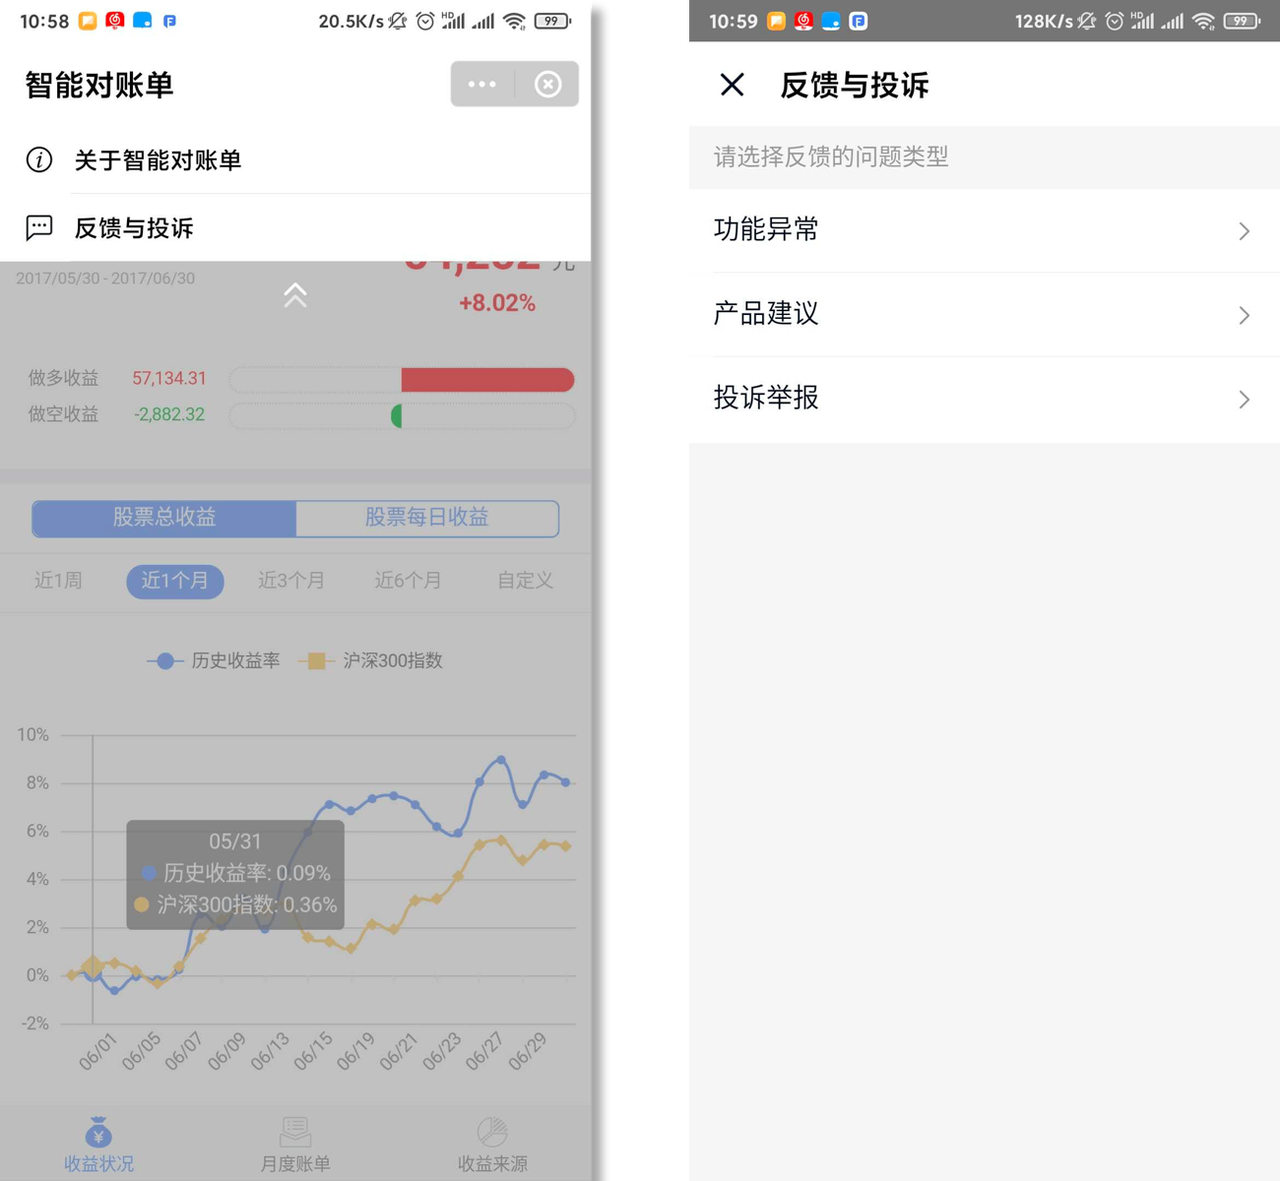
Among them, 「Complaint Report」 will be collected in the Administration Portal's complaint reporting system (there is also an entrance on the Workbench - Workflow). Please handle it promptly.
7.Workflow
There are other operations that require your attention. You can enter the 「workflow」through the entrance at the top right corner of the homepage. It will include relevant business processes that you need to handle (such as Mini-Program review, Mini-Program binding, custom API calls, etc.). The Workflow allows you to quickly access the business processes that need attention, helping you to carry out related tasks efficiently.
