Appearance
Host App Tutorial
1.Feature Introduction
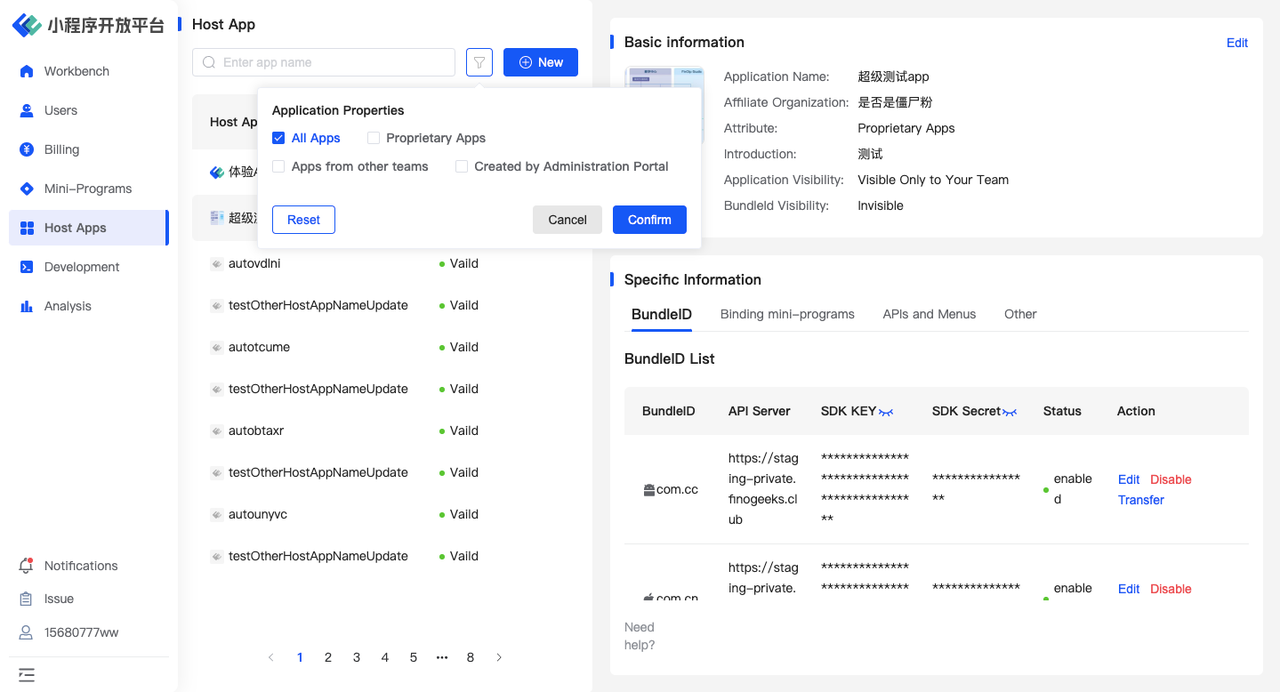
In the「Application Management」page, you can:
- Add Apps: Create a new host app and configure its basic information (name, icon, app visibility, etc.).
- View Apps: View apps created by the operations platform or other teams.
- Binding Mini-Program: Associate mini-programs with owned apps or third-party apps (other teams, operations platforms).
- API Management: Set up custom APIs and manage their basic information and call audit status.
- Menu Management: Set up custom menus and manage their basic information and call audit status.
- View Operation Logs: View operation logs for app modules.
2.Term Definitions
None
3.User Guide
3.1 Add APPs
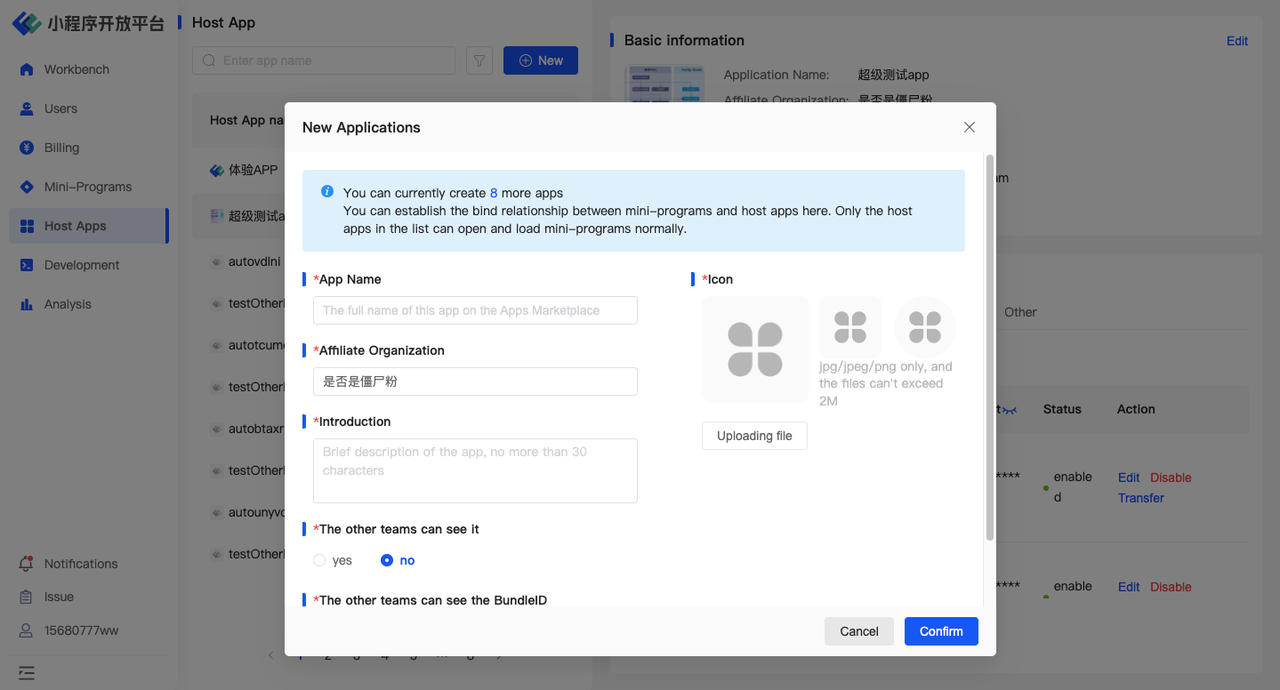
Go to the「App Management」page.Click the「Add」button on the left side of the list.Fill in the corresponding basic information for the application, including:
- App Name: Used to mark the name of the new app to avoid content discrepancies when adding BundleIDs.
- App Ownership Organization: Used to mark the organization to which the new app belongs, serving as a mnemonic for subsequent management.
- Brief Introduction: A simple one-sentence description of the app.
- Icon: Used to identify the app, serving as a mnemonic for subsequent management.
- Is the App Visible to Other Teams: Set to 'Yes' if the app should be visible in the app list of other teams.
- Is the App's Bundle ID Visible to Other Teams: Set to 'Yes' if the app's Bundle ID should be visible to other teams.
(Note: The visibility settings for these two operations will be controlled by the Administration Portal. If the Administration Portal does not allow the Developer Portal to set app visibility, these options can only be set to 'No' and cannot be changed.)"
After successfully adding a new application, it will be displayed in the list on the left side. If you wish to deactivate the ability to run in a certain application, you can also click on the「Deactivate」button in the action column to perform this operation.
3.2 ADD Bundle ID
After adding a new app, click on「Add Bundle ID」in the list below. In the pop-up window that appears, enter the Bundle ID that needs to be bound to the app. If you are unsure how to obtain the Bundle ID, click here.

**Please note: ** During SDK initialization, the current appli's BundleID will be verified for consistency. Please ensure that the BundleID you enter matches the actual one.

After completing the BundleID entry and clicking the 'Confirm' button, you will see the interface as shown above. The SDK KEY,SDK SECRET and API SERVER are credentials that you will need when integrating the mini-program SDK.
3.3 Binding mini-programs
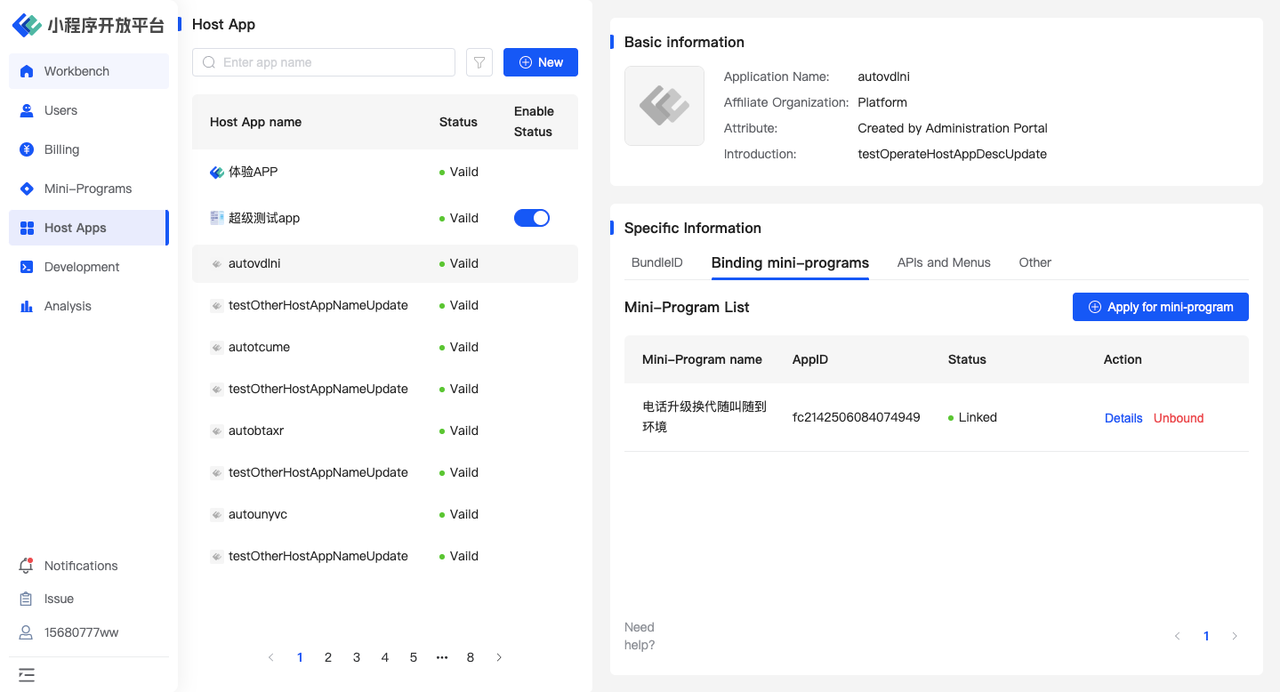
Click on「Binding Mini-Program」to view the mini-programs already associated with the app. Click on「Edit Mini-Program」to batch manage the association or disassociation of mini-programs.

If you wish to associate your own mini-program with an app created by another team or platform, you need to locate the desired app, click on「Associate Mini-Program」, and then click on「Apply to Associate Mini-Program」in the list. You can also view the mini-programs currently in the process of applying for association, as well as those already associated with the app. From there, you can perform actions such as re-association or disassociation.
3.4 APIs and Menus
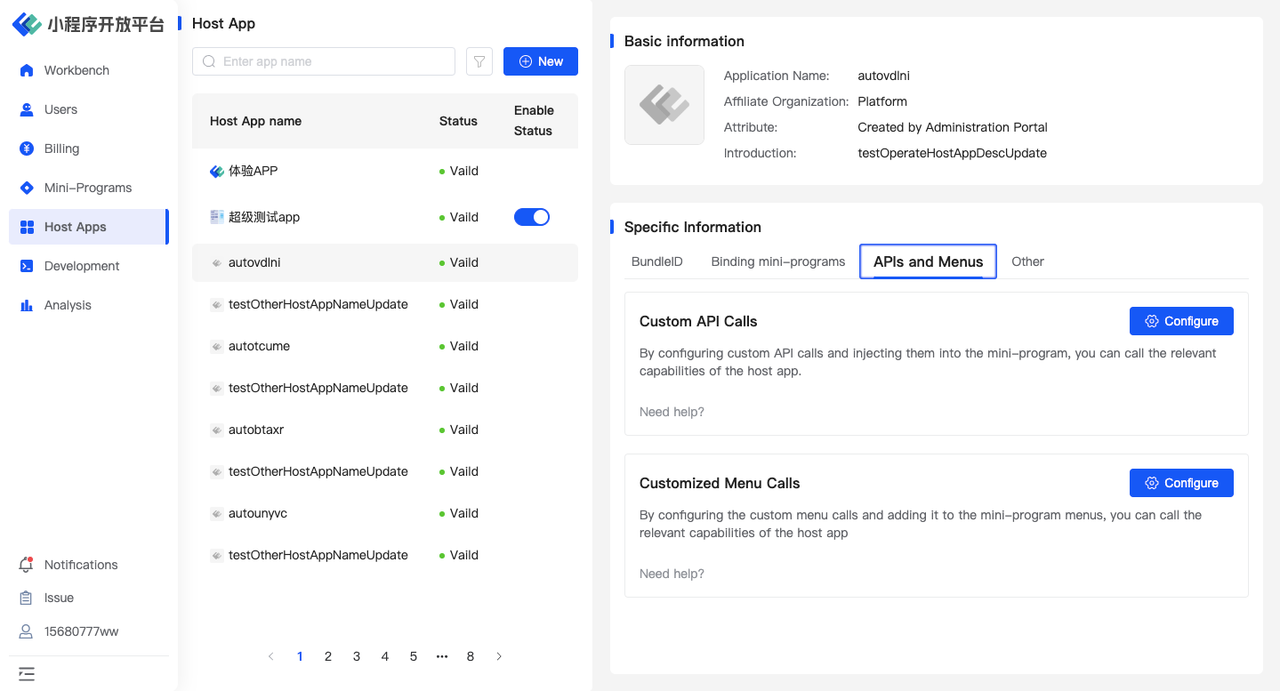
When integrating mini-programs into the host app, there may be scenarios where different permissions are assigned to mini-programs from different sources. For example, assigning advanced permissions such as transactional payments and privacy information management to proprietary mini-programs, and assigning common permissions such as user authorization login to third-party mini-programs. To ensure unified management of permissions that different mini-programs can use, you can use the API and Menu Management feature.
API Configuration
Click on「Configure」in the「Custom API Calls」action column to enter the API management page. Here, you can add, disable, or modify APIs.
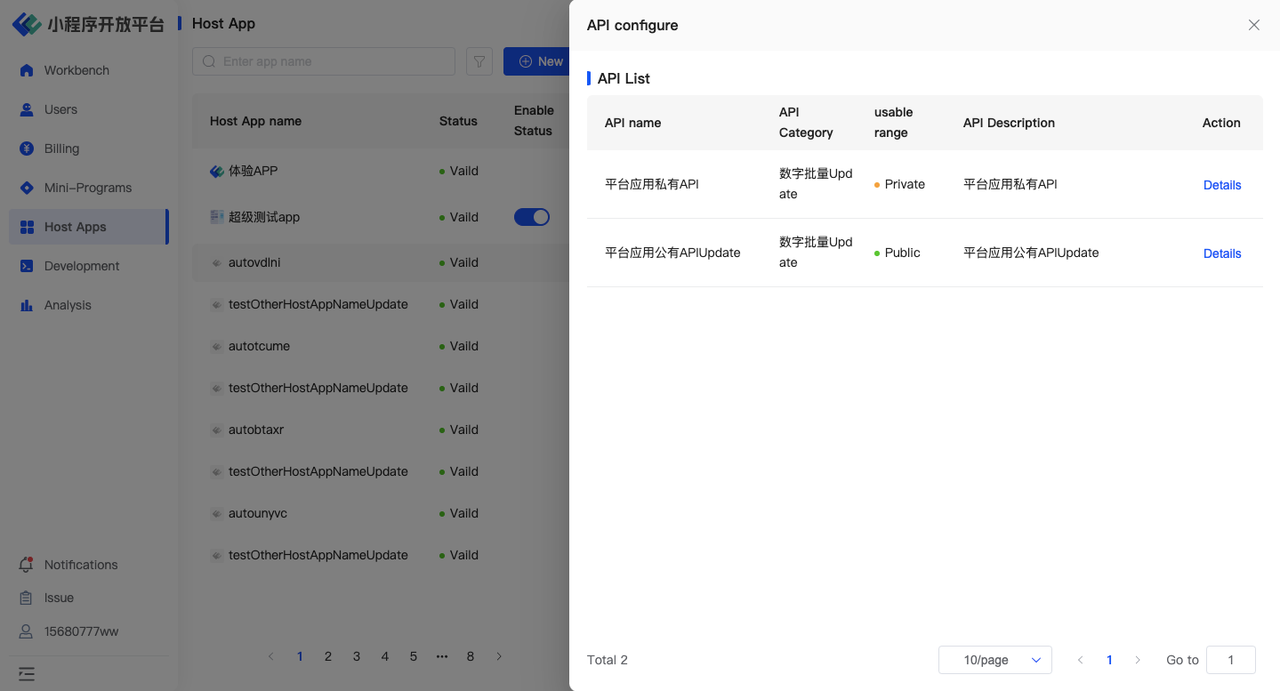
Click on「Add API」in the list to enter the relevant API injected into the host app through custom injection. The information to be entered includes:
- API Name: The specific name of the API.
- API Category: A category tag for the API to help developers manage and filter the corresponding available scope.
- Availability Status: Divided into 'Public' and 'Private' states. Public type APIs can be used without application, while private type APIs need to be applied for and approved before use.
- Description: Additional descriptive information about the API.

Menu Configuration
Click on「Configure」in the「Customized Menu Calls」action column to enter the menu management page. Here, you can add, disable, or modify custom menus, as well as modify the names and categories of SDK-provided menu icons.
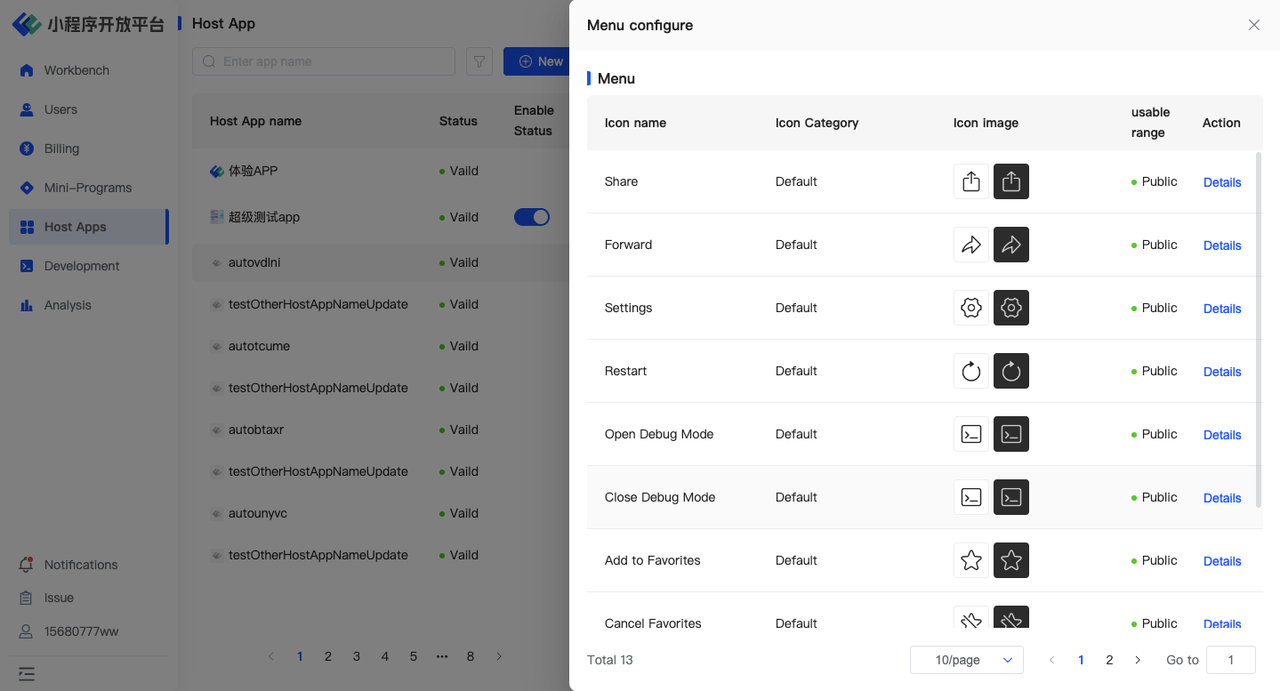
Click on「Add Menu」in the list to enter the relevant menu injected into the host app through custom injection. The information to be entered includes:
- Icon Name: The specific name of the menu icon.
- Icon Image: The image content of the icon is divided into two images, for light mode and dark mode.
- Icon ID: The ID information is called in the mini-program.
- Availability Status: Divided into「Public」and「Private」states. Public type menus can be used without application, while private type menus need to be applied for and approved before use.
Please note: To call menu icons in the mini-program, you need to use the injection method yourself. For guidance, please click on 'UI Customization/Set More Menus in Mini-Programs/12. Inject More Menu Items' in the UI Customization section.
API and Menu Management
Click on「Manage」in the「API and Menu Management」action column to enter the list page. Here, you can perform audit operations for APIs and menus, and also deactivate APIs and menus that have been approved. Deactivation here means stopping the mini-program from using the API or menu.
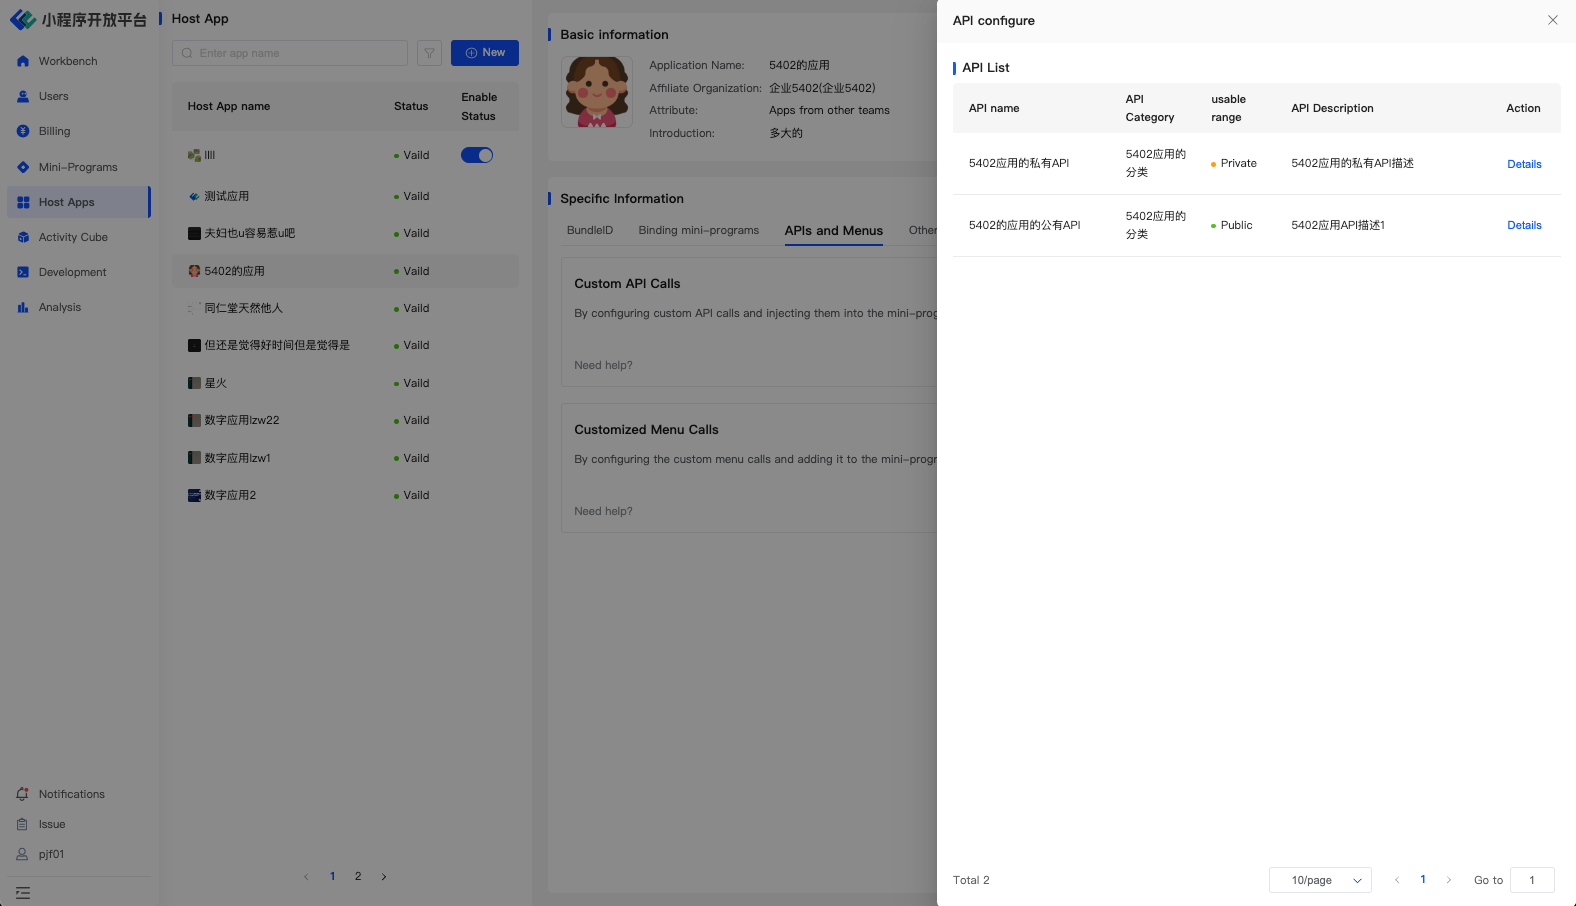
Click on 'View Details' to see the corresponding details of the API or menu application. For information that is under review, you can choose to approve or reject it. For information that has been approved, you can choose to deactivate it.

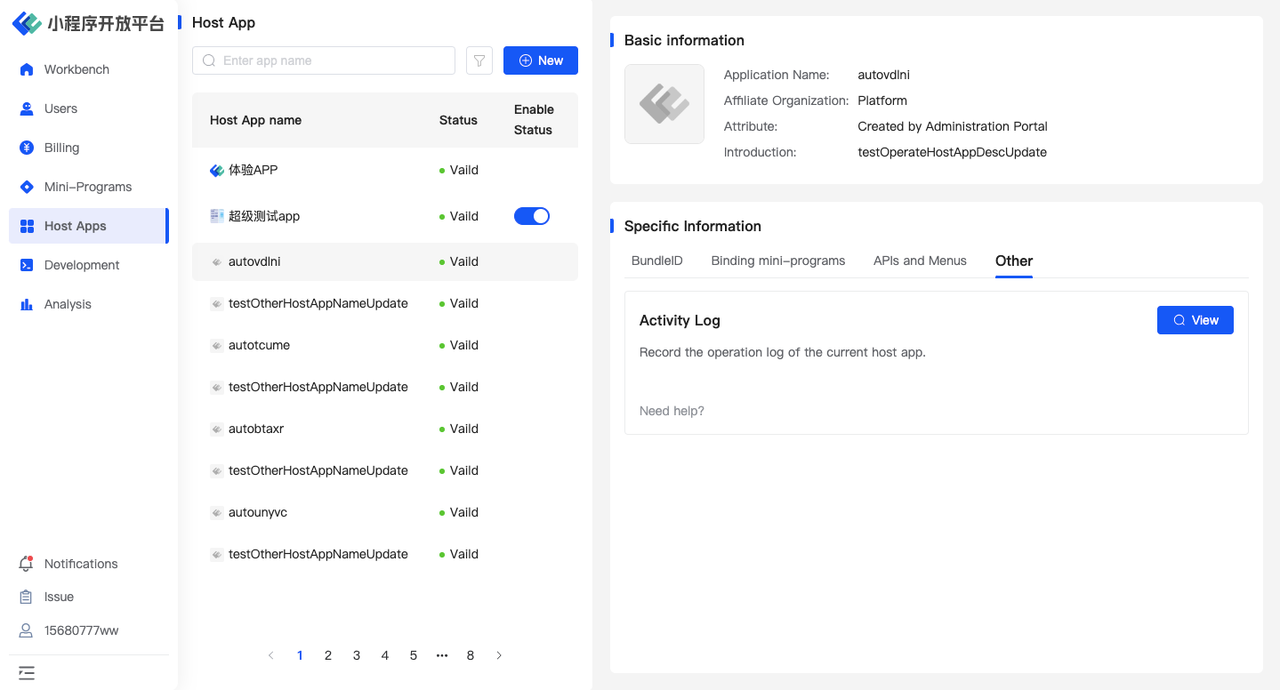
3.5 Other
- Operator: Refers to the user who performed the operation.
- Operation Module: Indicates the specific functional module in which the user performs the corresponding operation, corresponding to specific business logic (in this case, app management).
- Operation Type: Specifies what type of operation was performed within the functional module.
For example, if user A creates a new app in the 'App Management' module, the details would be: Operator: User A, Operation Module: App Management, Operation Type: New App."
4.Environment Overview
| Community | SaaS | Enterprise (Annual Subscription or One-time Purchase) | |
|---|---|---|---|
| APP Management | ✅ | ✅ | ✅ |