这篇文章主要介绍了微信小程序 开发之顶部导航栏实例代码的相关资料,需要的朋友可以参考下
微信小程序 开发之顶部导航栏
需求:顶部导航栏
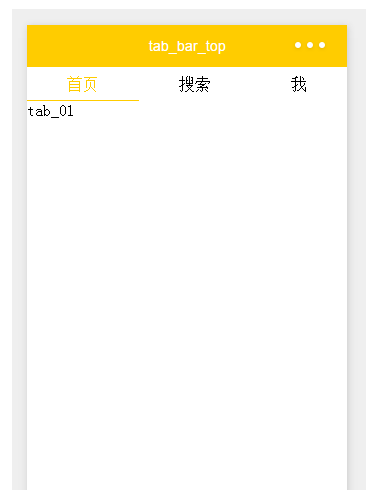
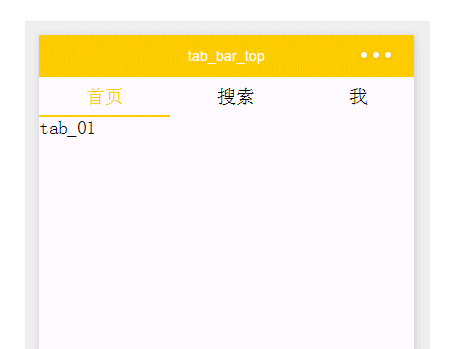
效果图:
wxml:
1 2 3 4 5 6 7 8 9 10 11 12 13 14 15 16 17 18 19 | <!--导航条-->
<view class="navbar">
<text wx:for="{{navbar}}" data-idx="{{index}}" class="item {{currentTab==index ? 'active' : ''}}" wx:key="unique" bindtap="navbarTap">{{item}}</text>
</view>
<!--首页-->
<view hidden="{{currentTab!==0}}">
tab_01
</view>
<!--搜索-->
<view hidden="{{currentTab!==1}}">
tab_02
</view>
<!--我-->
<view hidden="{{currentTab!==2}}">
tab_03
</view>
|
wxss:
1 2 3 4 5 6 7 8 9 10 11 12 13 14 15 16 17 18 19 20 21 22 23 24 25 26 27 28 29 | page{
display: flex;
flex-direction: column;
height: 100%;
}
.navbar{
flex: none;
display: flex;
background: #fff;
}
.navbar .item{
position: relative;
flex: auto;
text-align: center;
line-height: 80rpx;
}
.navbar .item.active{
color: #FFCC00;
}
.navbar .item.active:after{
content: "";
display: block;
position: absolute;
bottom: 0;
left: 0;
right: 0;
height: 4rpx;
background: #FFCC00;
}
|
js:
1 2 3 4 5 6 7 8 9 10 11 12 | var app = getApp()
Page({
data: {
navbar: ['首页', '搜索', '我'],
currentTab: 0
},
navbarTap: function(e){
this.setData({
currentTab: e.currentTarget.dataset.idx
})
}
})
|
运行:
感谢阅读,希望能帮助到大家,谢谢大家对本站的支持!
版权声明:本文内容由网络用户投稿,版权归原作者所有,本站不拥有其著作权,亦不承担相应法律责任。如果您发现本站中有涉嫌抄袭或描述失实的内容,请联系我们jiasou666@gmail.com 处理,核实后本网站将在24小时内删除侵权内容。


暂时没有评论,来抢沙发吧~