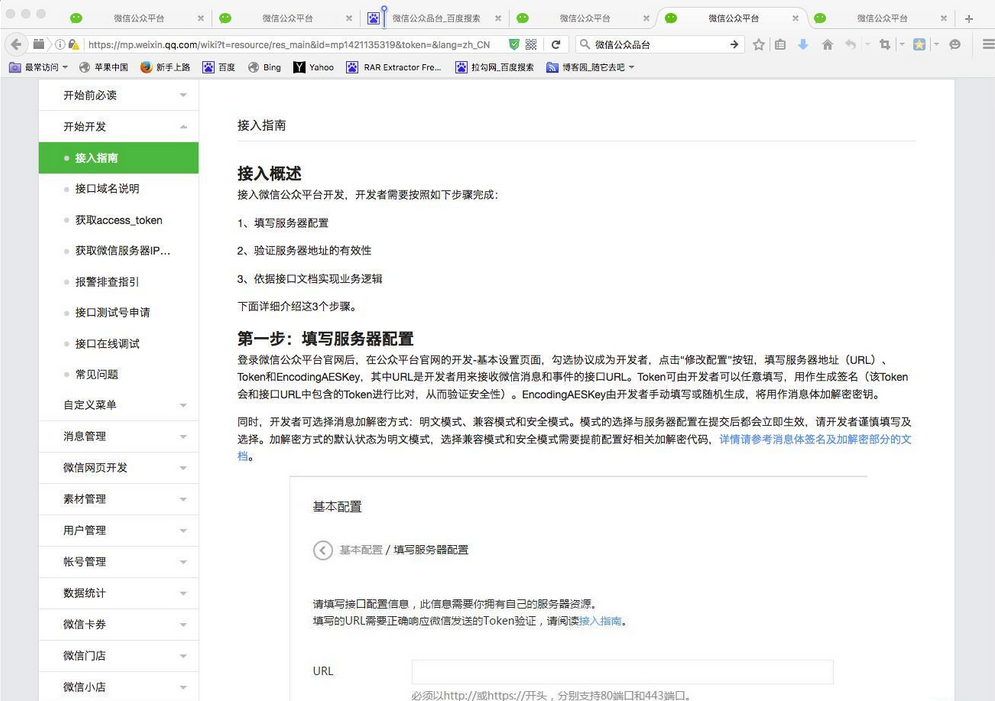
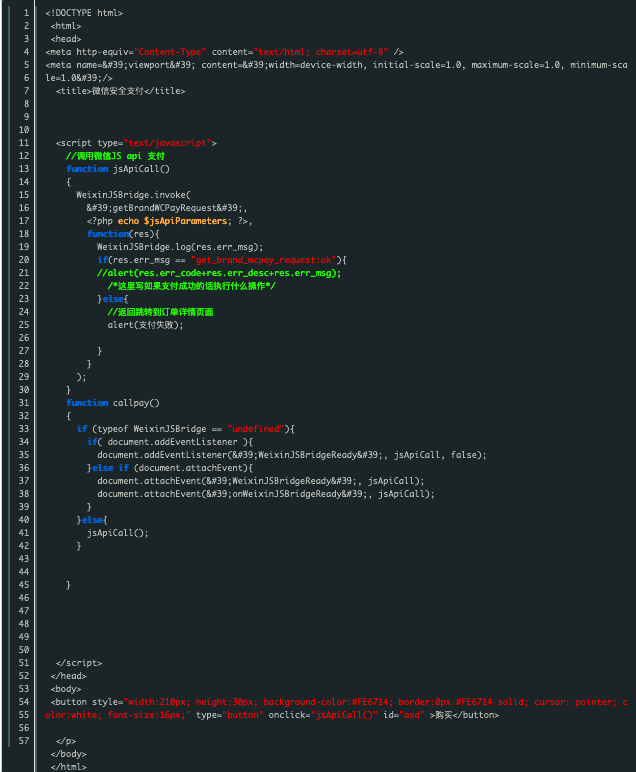
开发微信公众平台配置接口程序详细步骤
554
2022-11-16

Filebeat收集Nginx日志

-
1、查看Filebeat支持模块
./filebeat modules list
2、启动Nginx模块
启动命令:./filebeat modules enable
3、查看modules.d目录中的文件,可以看到nginx.yml配置文件,证明nginx module模块已开启
ls
4、配置modules.d/nginx.yml文件,指定access.log 和 error.log 的地址
vim
# Module: nginx# Docs: module: nginx # Access logs access: enabled: true var.paths: ["/data/logs/nginx-1.16.1/access.log"] # Set custom paths for the log files. If left empty, # Filebeat will choose the paths depending on your OS. #var.paths: # Error logs error: enabled: true var.paths: ["/data/logs/nginx-1.16.1/error.log"] # Set custom paths for the log files. If left empty, # Filebeat will choose the paths depending on your OS. #var.paths:
5、配置test-nginx.yml文件
# 自定义测试配置文件test-nginx.yml# 输入filebeat.inputs:# 指定索引的分区数setup.template.settings: index.number_of_shards: 3filebeat.config.modules: path: ${path.config}/modules.d/*.yml reload.enabled: false# 输出到指定ES的配置output.elasticsearch: hosts: ["127.0.0.1:9200"] username: "elastic" password: "123456"
6、运行filebeat:
"publish"
版权声明:本文内容由网络用户投稿,版权归原作者所有,本站不拥有其著作权,亦不承担相应法律责任。如果您发现本站中有涉嫌抄袭或描述失实的内容,请联系我们jiasou666@gmail.com 处理,核实后本网站将在24小时内删除侵权内容。
发表评论

暂时没有评论,来抢沙发吧~